EN
EN

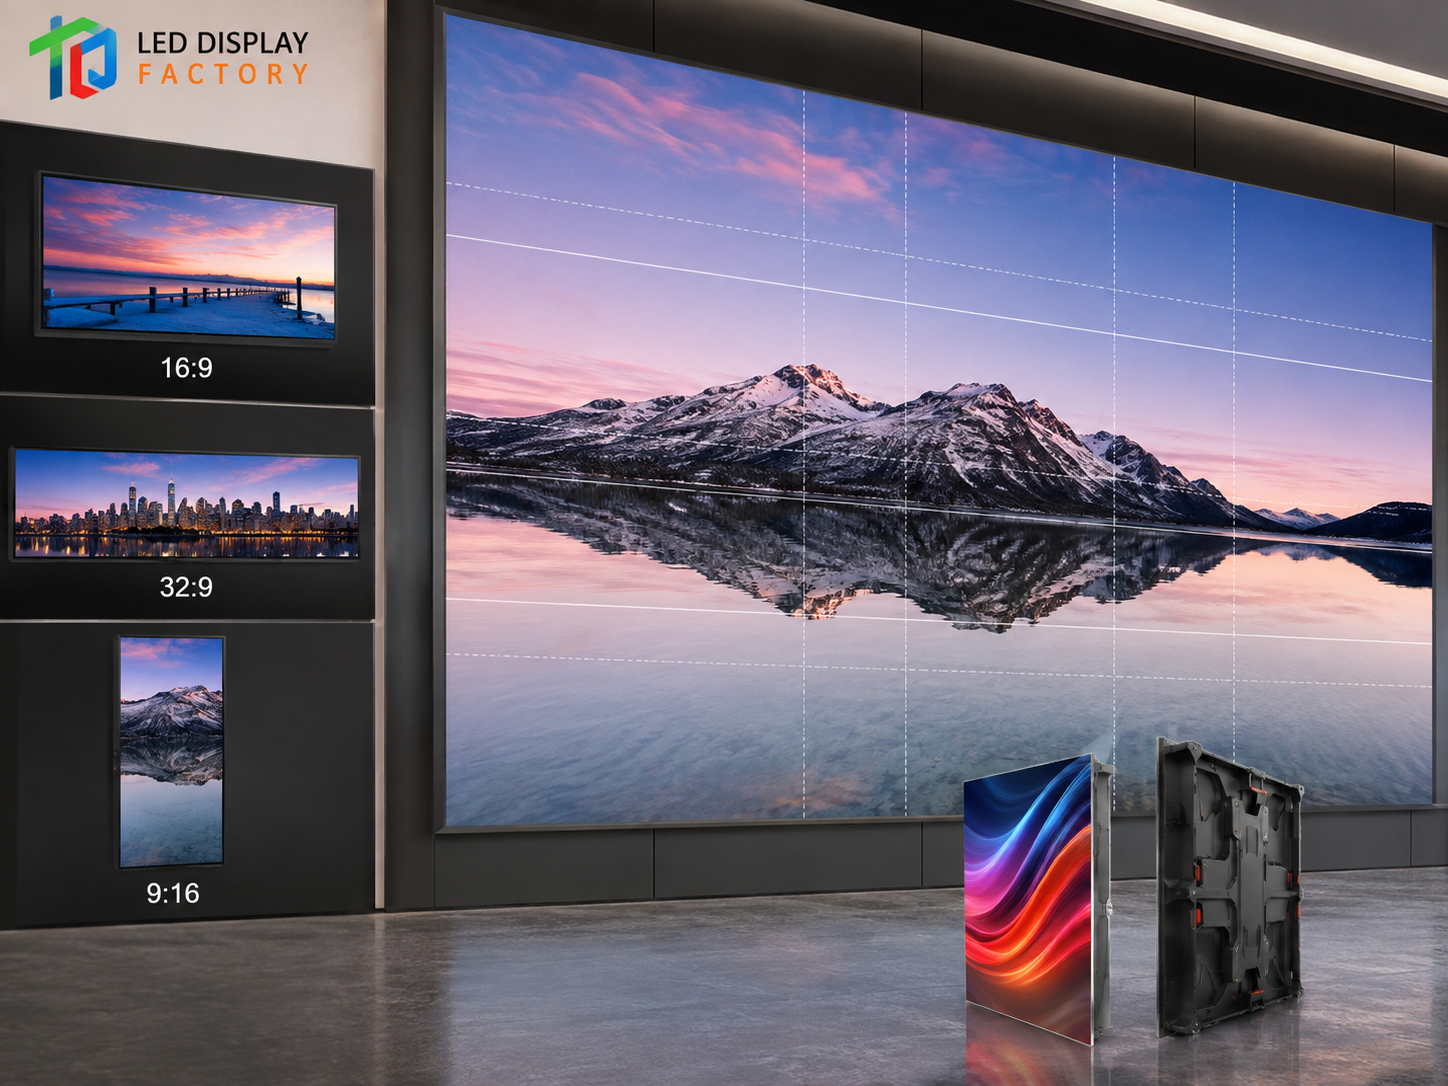
A custom LED display should be planned around the content canvas as well as the available installation area. The key question is whether the finished LED pixel matrix suits the video, presentation, graphics, data or real-time media that will run on it. A screen can fit the wall perfectly and still force daily scaling, cropping, letterboxing or content redesign.
This custom LED display aspect ratio guide starts with the master content format and works backward to the screen proportion, pixel pitch, physical dimensions and final raster. It is intended for buyers, designers and engineering teams who need to settle 16:9, ultra-wide, portrait, 1080p or 4K content requirements before the screen specification is frozen.
Choose the Screen Ratio from the Content Format
Aspect ratio describes the relationship between image width and height. For an LED project, it also determines how efficiently an existing video library, presentation template, graphics package or live-production layout can occupy the final screen without recurring conversion work.
Start with the dominant everyday content. A standard video environment usually benefits from 16:9. A panoramic dashboard or scenic wall may need an ultra-wide canvas. Portrait artwork, directories and vertical campaigns work better when the production template is designed vertically from the beginning.
Use when: most daily sources are presentations, conference feeds, Full HD video or UHD video.
Confirm: whether the final LED raster must match 1920×1080 or 3840×2160, or whether scaling is acceptable.
ZONE
FEED
Use when: the extra width carries panoramic graphics, dashboards, branded space or several deliberate content zones.
Confirm: the exact master canvas and minimum pixel width required by every important zone before screen production.
VISUAL
DIRECTORY
Use when: directories, menus, tall artwork or vertical advertising already follow a portrait hierarchy.
Confirm: that typography, motion paths and safe areas will be produced natively in portrait rather than cropped from landscape.
| Content condition | Starting ratio | Why it fits | Confirm before ordering |
|---|---|---|---|
| Existing Full HD or UHD media library | 16:9 | Reduces repeated cropping and layout conversion. | Must the content remain pixel-for-pixel, or is controlled scaling acceptable? |
| Conference and presentation sources | 16:9 | Matches familiar computer and presentation formats. | Which source resolution and connector format will be used during normal operation? |
| Panoramic motion graphics or dashboards | Ultra-wide / custom | Provides deliberate horizontal space for a scene or several zones. | What exact master canvas and minimum zone widths will the design team use? |
| Tall artwork, menu or directory | Portrait | Supports vertical hierarchy without forcing a landscape asset into a narrow frame. | Will typography, motion paths and protected edge areas be produced natively in portrait? |
The horizontal and vertical LED pixel counts still need to be checked. Two displays can have nearly identical outside proportions while using different rasters and different scaling policies.
Connect Physical Size, Pixel Pitch and the Final Pixel Matrix
Physical dimensions describe the active width and height of the screen. Pixel pitch is the distance between neighboring pixels. The pixel matrix records how many addressable pixels exist horizontally and vertically. These values are connected, but they are not interchangeable.
Two screens with the same physical dimensions can provide very different content rasters when their pitches differ. The reverse is also true: one target raster can produce several possible physical sizes when different pitches are compared.
Example: 1920×1080, 3840×2160, 3840×1080 or a defined portrait raster.
Pitch determines the physical distance required to create the target number of pixels.
The idealized active dimensions can then be checked against the available installation envelope.
Approximate horizontal pixels = active width in millimeters ÷ pixel pitch in millimeters
Approximate vertical pixels = active height in millimeters ÷ pixel pitch in millimeters
Idealized active size = target pixel count × pixel pitch
When native resolution is the priority, reverse the calculation. For example, 3840 horizontal pixels at a theoretical 1.5 mm pitch require 5760 mm of active width. At 2.5 mm, the same horizontal count requires 9600 mm. The calculation shows the design direction before a manufacturer checks real modules, cabinets and installation clearance.
Compare pitches against the same physical screen size
A second comparison keeps the active screen dimensions fixed. Consider an idealized 6.0 m-wide 16:9 image area, which is 3.375 m high. At 1.5 mm pitch, the mathematical raster is approximately 4000×2250 pixels. At 2.5 mm pitch, it is approximately 2400×1350 pixels. The wall occupies the same physical area in both cases, but the available content canvas changes substantially.
This comparison is useful when the architectural opening cannot change. It shows whether a finer pitch provides a visible benefit for the planned content or only adds pixels that normal viewers and media will not use. A fair quotation comparison should keep physical size, content test, viewing position and included control equipment consistent.
| Target raster | Example pitch | Idealized width | Idealized height | Planning use |
|---|---|---|---|---|
| 1920×1080 | 1.5 mm | 2.88 m | 1.62 m | Native Full HD reference |
| 1920×1080 | 2.5 mm | 4.80 m | 2.70 m | Larger Full HD reference |
| 3840×2160 | 1.5 mm | 5.76 m | 3.24 m | Native UHD reference |
| 3840×2160 | 2.5 mm | 9.60 m | 5.40 m | Large native UHD reference |
| 3840×1080 | 1.5 mm | 5.76 m | 1.62 m | Ultra-wide canvas reference |
| 1080×1920 | 1.5 mm | 1.62 m | 2.88 m | Portrait Full HD-style reference |
Round the theory to real LED hardware
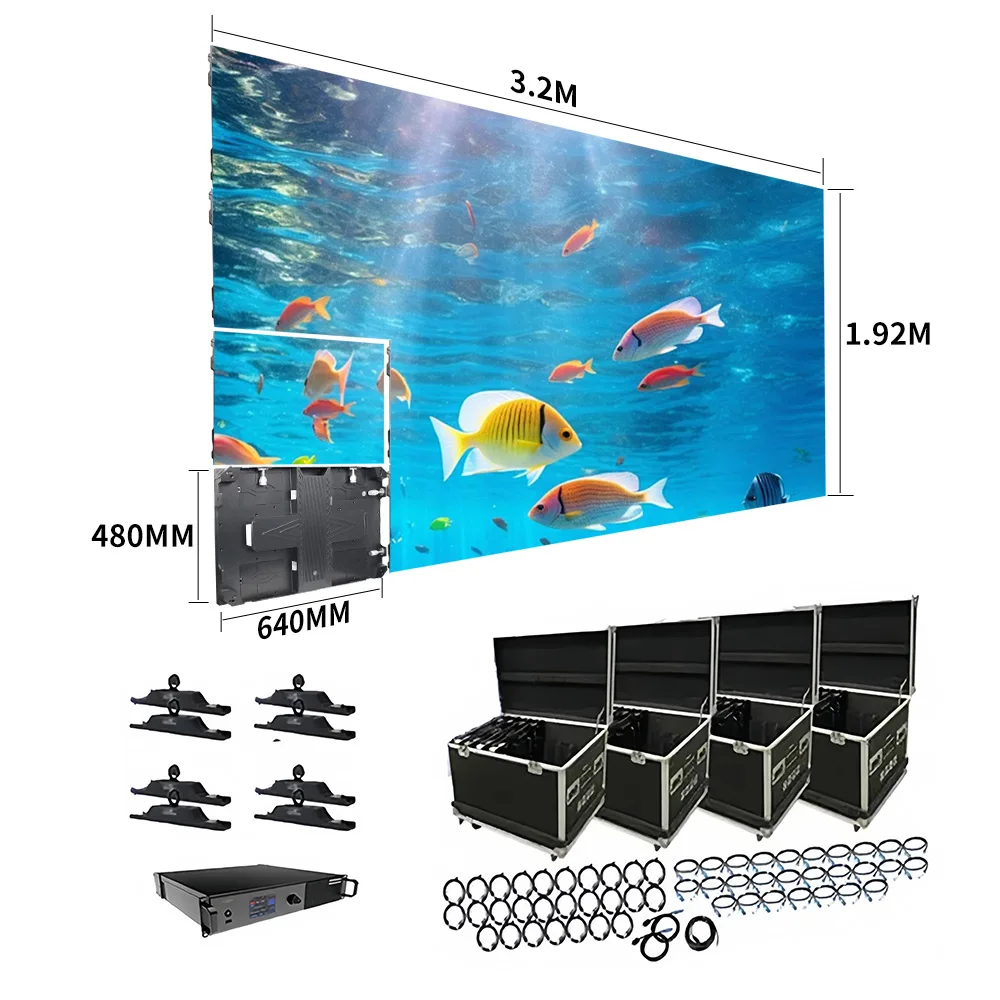
A manufacturable screen must use complete module and cabinet combinations. Ask the supplier to state the cabinet pixel matrix, cabinet quantity across and high, final active resolution, active image size and complete installed envelope.
If the cabinet grid produces a nearby raster rather than the exact target, confirm whether the processor will scale, crop or letterbox the source. For a product-specific calculation, compare the complete cabinet examples in the P0.9 vs P1.25 fine-pitch LED display guide.
Small-Pitch LED Displays for Detailed Content
A smaller pitch can place more addressable pixels inside the same physical area. It becomes relevant when a restricted wall opening must support detailed graphics, interfaces, maps, fine typography or a defined native-resolution target.
Pitch should still be checked against viewing distance, available dimensions, content sensitivity and the real cabinet grid. The product family is a starting point for comparing those constraints, not a substitute for the final raster calculation.
View Indoor Small-Pitch LED DisplayDecide How the Source Will Map to the LED Raster
Physical fit answers whether the display occupies the intended wall area. Content mapping answers what happens when the source canvas reaches the final LED pixels. These two decisions can diverge even when the outside screen shape appears correct.
A source and an LED wall can share the same aspect ratio while using different pixel counts. For example, 1920×1080 and 3840×2160 are both 16:9, but one still needs resolution conversion when it fills the other raster. The conversion may be acceptable for video and visibly weaker for small text, thin lines, maps or interface graphics.
One source pixel maps to one LED pixel. Strongest for fine text, line graphics, detailed dashboards and raster artwork.
The full source is resized without changing its proportion. Useful when the content tolerates interpolation and the aspect ratios match.
The image fills a different screen shape by removing edges. Logos, faces, subtitles and critical data need protected safe areas.
Unused regions preserve the source composition or become deliberate branded, data or supporting content zones.
“Accepts a 4K source” and “contains 3840×2160 physical pixels” are different statements
A UHD signal can enter a processor that maps the image to a different physical LED raster. Project documents should record the incoming signal, master creative canvas and final LED pixel matrix as separate values.
Set safe areas when cropping may be used
Crop-to-fill removes part of the source when its proportion differs from the LED canvas. Logos, titles, subtitles, faces, product details and critical data should stay away from vulnerable edges. A documented safe-area guide prevents different designers from making different assumptions for each campaign.
Ultra-wide installations often work better when backgrounds are extended and the important subject remains inside a protected central region. Portrait projects usually need a separate vertical composition because rotating or cropping a landscape asset does not preserve typography, motion paths or visual hierarchy.
Use letterboxing deliberately, not accidentally
Letterboxing or pillarboxing preserves the complete source composition by leaving unused pixels around it. This can be acceptable for temporary events or occasional guest sources. A permanent display usually looks stronger when those regions carry intentional background graphics, data or branding. Record the policy in advance so operators do not make a different fill decision for every asset.
Give multi-zone content a pixel budget
A percentage alone does not show whether a dashboard, presentation window or data panel has enough detail. If a zone uses 30 percent of a 3840-pixel-wide canvas, its working width is about 1152 pixels. That number gives the design team something concrete to test against labels, charts and video windows.
For an ultra-wide wall, define the master canvas and the important zones before artwork production. One 3840×1080 layout might reserve a 1920×1080 central video window and use the remaining width for data or branded graphics. Another project may use the full raster as one panoramic scene. The correct choice follows the content hierarchy.
Test difficult content before the raster is approved
Cinematic footage can hide mapping weaknesses. A useful test asset should also contain small typography, thin borders, charts, gradients, subtitles, logos, maps and photographs. Use the same asset again during commissioning so the final screen is checked against the content that shaped the original decision.
Choose 1080p, 4K or a Custom Canvas for the Actual Workload
Standard resolutions simplify many production workflows, but an LED wall does not need to copy a conventional monitor in every project. Choose the target around the most demanding content used regularly, not the largest resolution label available in a quotation.
| Canvas direction | Best fit | Main benefit | Check before choosing |
|---|---|---|---|
| 1920×1080 | Presentations, conference feeds, signage graphics and common prerecorded media. | Familiar production environment with lower rendering and delivery demands. | Can the smallest normal text and graphics remain clear at the intended size? |
| 3840×2160 | Detailed monitoring interfaces, high-resolution design work and large multi-window layouts. | More native pixel capacity for dense information and several Full HD regions. | Does the daily content use the additional pixels, and can the wall area support the required pitch? |
| Ultra-wide custom | Panoramic scenes, ribbon displays, dashboards and multi-zone information walls. | Uses the extra width intentionally instead of stretching or heavily cropping standard video. | Can the editing, playback and graphics systems support one documented master canvas? |
| Portrait custom | Directories, menus, vertical advertising and tall information structures. | Protects vertical composition and avoids repeated landscape-to-portrait conversion. | Is text density or image composition the more demanding requirement? |
A 4K source does not automatically require a native 4K wall. Full-screen video and large photography often tolerate controlled conversion more easily than detailed interfaces. Small legends, thin chart lines and complex maps expose downscaling sooner. Preserve native 4K when the operating layout needs it; otherwise, document and test the planned conversion instead of paying for unused resolution.
Keep the creative canvas, input signal and delivery file separate
A project-specific creative canvas can exist inside a conventional output signal. An ultra-wide composition may be produced at a custom raster and then carried through a larger signal frame. A very large LED canvas may also use several processor outputs even though the design team works from one coordinated master.
The master resolution describes where the final creative work is produced. The input or playback format describes what reaches the processor. The physical LED raster describes the pixels available on the display. These values may match, but project documents should never assume that they do.
Preview and delivery files can differ as well. A smaller preview may be used for approval or remote collaboration, while the operational file retains the full production raster. Naming the master, preview and final delivery versions clearly prevents a lightweight review file from being mistaken for the asset intended for the screen.
Build the Screen Specification from the Content Workflow
Content-first planning does not replace viewing-distance, structural or installation engineering. It brings the media requirements into the project early enough to influence the screen. Use the following sequence before final approval.
Audit the existing media
Group normal assets into Full HD video, UHD video, presentations, portrait artwork, camera feeds, dashboards and custom motion graphics. Note which approved assets would be expensive to rebuild.
Separate pixel-sensitive assets
Dashboards, small type, maps, diagrams and dense data need closer review. Scenic motion, photographic backgrounds and cinematic video usually allow more scaling flexibility.
Select one primary master canvas
Choose the normal production environment: 16:9, portrait, ultra-wide or another exact project raster. A stable master reduces recurring crop and conversion decisions.
Compare real screen alternatives
Ask for at least two practical pitch and cabinet combinations showing active size, final raster and mapping method under the same installation assumptions.
Test and freeze the handoff sheet
Approve the canvas, safe areas, source format, mapping policy and difficult test assets before final artwork production. Recheck them if the screen raster changes.
Project Information to Confirm Before Quotation
Buyers do not need to know the final pixel pitch before contacting a supplier. A useful request gives the factory enough information to compare suitable pitch, cabinet and raster options. Combine the content fields below with the physical measurements and site photos in the custom-size LED screen measurement guide.
| Field | Information to provide | Why it matters |
|---|---|---|
| Available active size | Target width and height, plus the maximum installation envelope | Sets the physical limit for pitch and cabinet combinations. |
| Nearest normal viewing distance | Distance from the screen face to the closest regular viewer | Prevents selecting pitch from resolution alone. |
| Master content canvas | Exact width × height in pixels and the intended orientation | Defines the creative workspace that the screen must support. |
| Normal source format | Presentation computer, media server, camera, signage player, live data or mixed sources | Separates the incoming signal from the physical LED raster. |
| Content sensitivity | Smallest text, thin lines, maps, dashboards, subtitles or other critical details | Shows what must remain readable after mapping. |
| Preferred mapping | Native, scale, crop, letterbox or custom zones; state “unsure” if it needs engineering review | Defines how any source-to-screen mismatch will be handled. |
| Multi-zone plan | Approximate pixel size or priority of each major video, data or branding region | Prevents important windows from becoming too compressed. |
| Representative files | A normal content sample plus the most demanding graphic or layout | Allows a meaningful scaling and readability test. |
What the supplier should return
- Proposed pixel pitch and the reason it fits the viewing and content conditions.
- Cabinet quantity across and high, cabinet pixel matrix and physical cabinet dimensions.
- Final active width, height and horizontal × vertical LED resolution.
- Source mapping method, processor scope and any crop or letterbox behavior.
- At least one alternative showing the trade-off between physical size, pixel density and budget.
Common Content-Resolution Mistakes
“Six meters wide” does not tell the content team how many pixels are available.
Aspect ratio describes proportion, not the horizontal and vertical pixel counts.
The input signal label cannot replace the physical LED matrix in technical documents.
Fix the master canvas and zones before the screen and production templates become difficult to change.
Landscape, portrait and ultra-wide layouts need different hierarchy and safe areas.
Fine text, lines and real operating layouts reveal mapping problems much faster.
FAQ
Does a 4K source require a native 3840×2160 LED wall?
No. A processor can map a UHD source to another physical raster. Native 4K becomes valuable when the operating layout genuinely needs the additional pixel capacity, such as dense dashboards, several Full HD windows or detailed design content. Large video and photography may work well with controlled scaling.
What if the idealized resolution does not align with complete cabinets?
The manufacturer should round the design to a practical module and cabinet grid, then report the resulting active size and exact LED raster. The team can decide whether a nearby resolution is acceptable or whether the pitch, screen size or master canvas should change.
What should a buyer send if the correct pixel pitch is unknown?
Send the available width and height, nearest viewing distance, indoor or outdoor condition, master content resolution, normal content type and a demanding sample file. The supplier can use those facts to compare suitable pitch and cabinet combinations instead of asking the buyer to guess a pitch first.
Send the project file needed for a practical raster comparison
Prepare the available screen width and height, nearest viewing distance, content orientation, master resolution, source type and the most detail-sensitive normal asset. If native 1080p or 4K is mandatory, state that requirement explicitly.
With those details, the factory can return practical pitch and cabinet options showing the final active size, LED pixel matrix and mapping method. The next decision becomes a clear comparison between physical fit, content fit and budget rather than a guess based on a resolution label.
Submit Size, Viewing Distance and Content Resolution