EN
EN

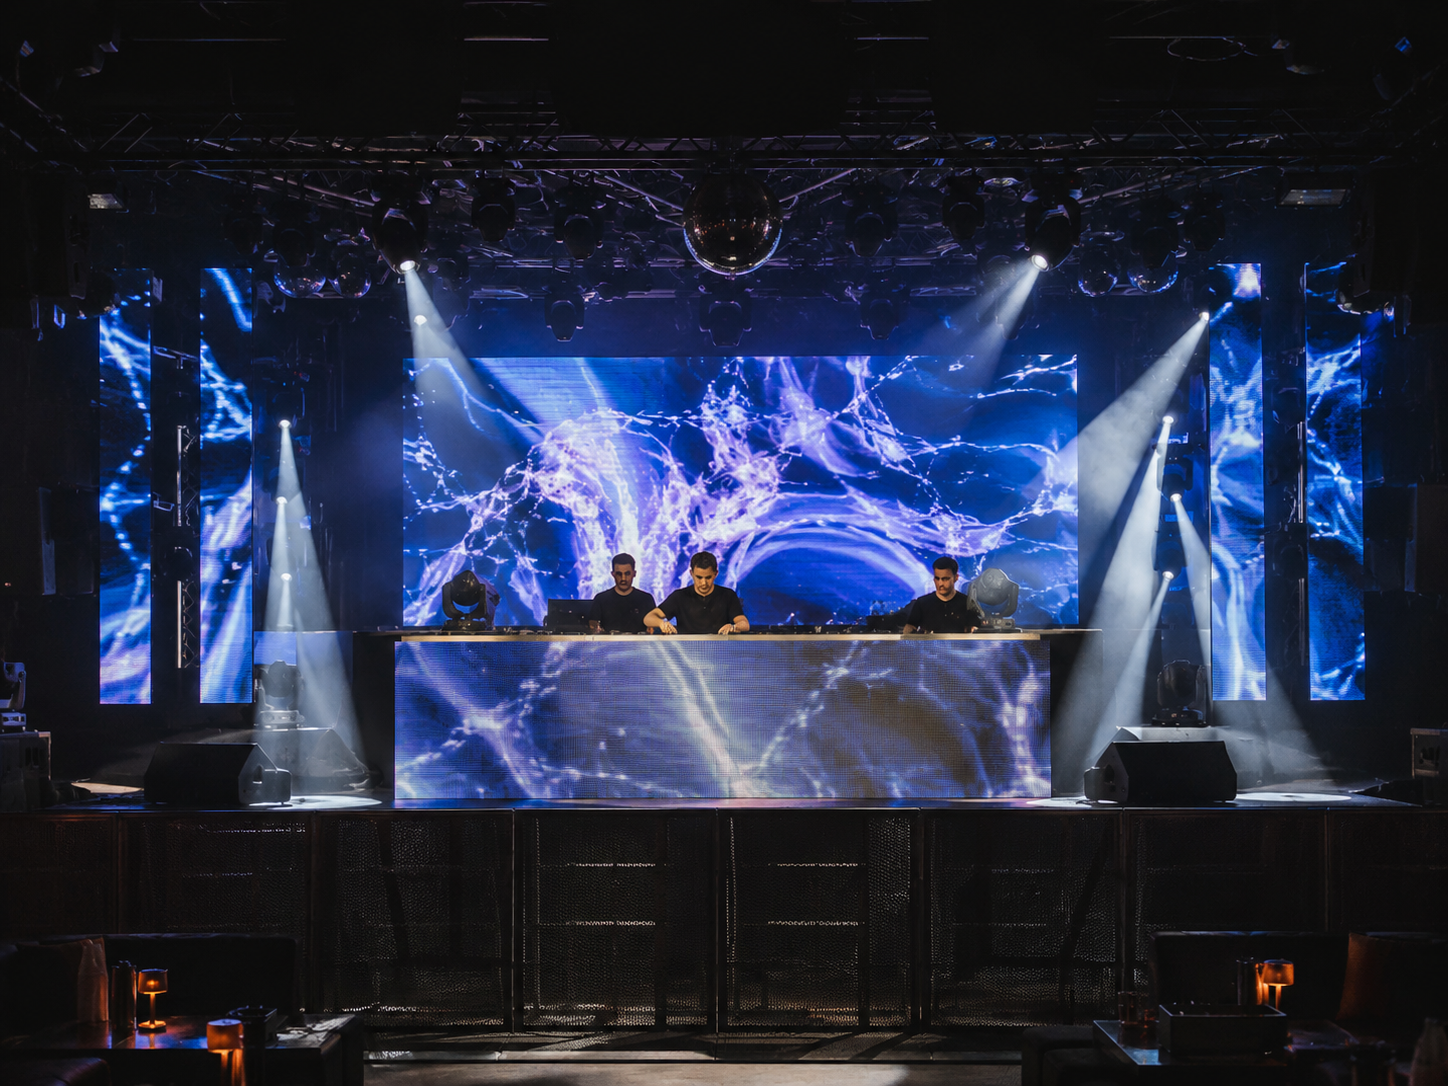
A nightclub dj booth led screen works in one of the hardest indoor display environments. The nearest audience area may sit only a few metres away, while phones and production cameras record rapid motion under strobes, moving heads, lasers, and haze. At the same time, the booth cannot become a new source of fan noise, trapped heat, blocked access, or late-night troubleshooting.
A reliable specification starts with the real stage layout rather than a generic rental-screen list. Screen position, nearest viewing distance, content canvas, camera workflow, timecode method, ventilation route, cabinet handling, and recovery time all affect the final configuration. This guide turns those variables into clear project decisions without relying on unverified refresh, weight, acoustic, or thermal claims.
1. Match Each Screen Position to a Different Job
A club stage may combine a booth face, a large background wall, two side surfaces, overhead strips, columns, or curved pieces. Although those areas share one visual identity, they do not share one viewing condition. The booth sits closest to the floor, while the main wall carries the broadest visual story and the side screens protect angled sightlines.
The booth face usually receives the hardest close-range inspection. People stand beside it, record short videos, and notice pixel structure, module seams, low-gray noise, or damaged masks. In contrast, the background wall can often use larger graphics and a wider pitch because the meaningful viewing distance increases quickly across the room.
Side screens solve coverage rather than detail. They may repeat the main canvas, extend a panoramic composition, or show independent loops. However, a steep viewing angle can reveal colour or brightness differences that remain hidden from the centre line.
Creative shapes add mapping and maintenance risk. A stepped wall, arch, column, or curved corner needs an exact pixel map and a clear replacement route. Otherwise, attractive geometry can create cropped logos, broken motion paths, unreachable modules, and inconsistent cabinet alignment.
| Screen position | Primary purpose | Typical viewing condition | Specification priority | Common failure point |
|---|---|---|---|---|
| DJ booth face | Artist identity, reactive graphics, close visual energy | Very close, below eye level, often blocked by equipment or hands | Fine pitch, low-bright image quality, surface protection, quiet thermal design | Visible pixels, drink exposure, blocked vents, difficult front access |
| Main background | Primary show canvas, live feed, branding, scene transitions | Mixed distances across the dance floor and camera frame | Scale, refresh performance, mapping, power zones, redundant signal paths | Flicker, excessive brightness, black sections, poor rear access |
| Side screen | Wider sightlines, supporting graphics, secondary camera feed | Angled views and usually longer distance | Viewing angle, colour match, synchronized playback, correct crop | Colour mismatch, distorted composition, weak side visibility |
| Overhead or column | Immersion, architectural rhythm, repeated visual accents | Steep angles, narrow canvases, difficult physical access | Weight, safe structure, aspect ratio, service method, heat path | Unreachable parts, wrong content ratio, heat accumulation |
| Curved or irregular surface | Distinct stage identity and continuous motion around corners | Changing angles and uneven distance | Geometry, cabinet compatibility, pixel map, spare-part access | Mapping gaps, uneven curvature, replacement difficulty |
This matrix prevents a costly shortcut: specifying every surface with the same cabinet and pitch before the stage roles are clear. A mixed configuration can be more sensible when the booth face needs close-detail performance and the main wall needs economical area coverage. However, mixed products must still be tested for colour, low-gray behaviour, white balance, and camera exposure.
For a modular main background or side wall, a P3.91 rental cabinet can be a sensible comparison when the nearest standing line is far enough away. It should not become the automatic booth-face choice. Close viewing, camera exposure, haze, sound, airflow, and service access still need a project test.
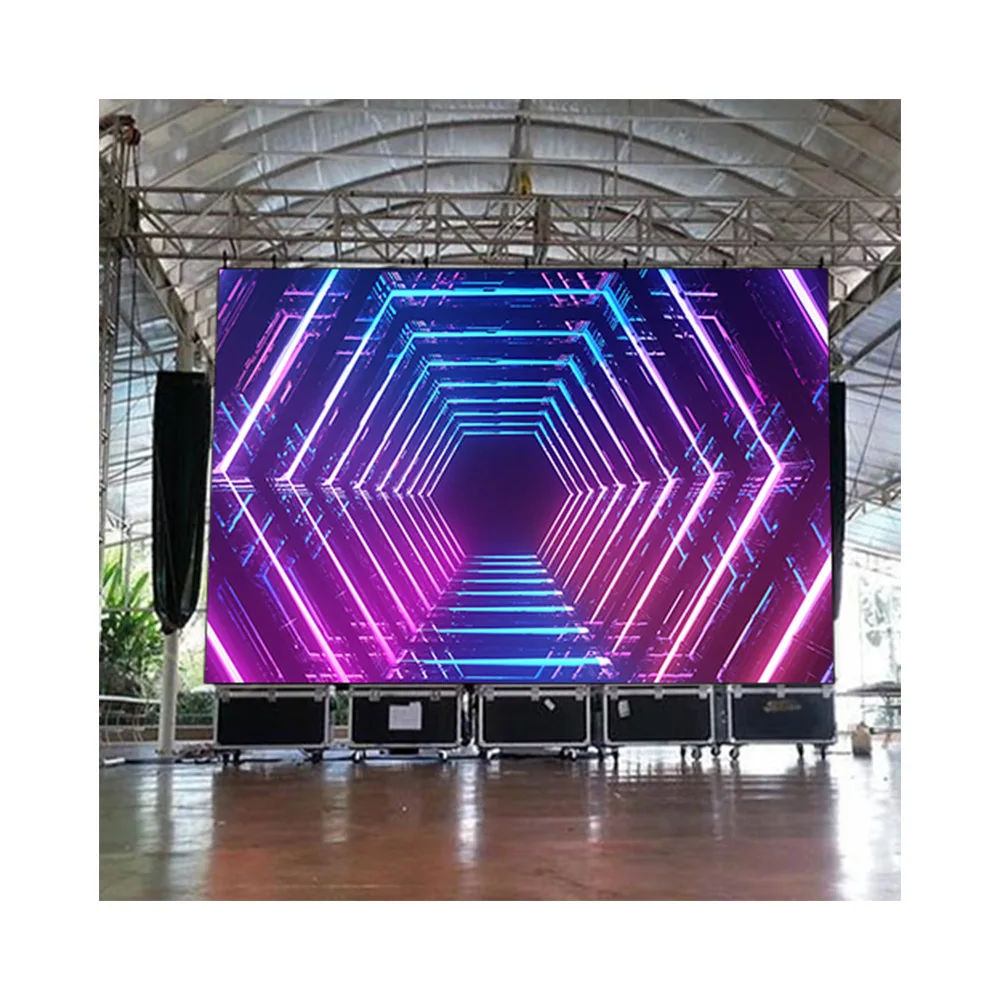
Where P3.91 fits: This format is worth comparing for a main background or side surface with enough viewing distance. For a close booth face, P2.6 or P2.976 should remain in the sample test.
View P3.91 500×500 Rental LED Display2. How to Choose a Nightclub DJ Booth LED Screen by Viewing Distance
Pixel pitch describes the distance between neighbouring pixels. A smaller number usually creates a finer image at close range, yet it also increases total pixel count and may raise processing, calibration, spare-part, and budget demands. For that reason, the correct choice starts with the nearest meaningful viewing point rather than the room’s maximum depth.
The nearest meaningful point may be the front-row standing line, the edge of a VIP table, a balcony rail, or a camera position. Once those points are marked, each screen zone can receive a separate pitch decision. The booth face often needs the tightest option, while a background wall may remain convincing with a wider pitch.
Content changes the result as well. Large abstract movement hides pixel structure better than small type, thin lines, sponsor marks, or detailed faces. Likewise, a screen used mainly for visual texture can tolerate different limits from one carrying close camera feeds and artist names.
The table below provides preliminary planning bands rather than guaranteed viewing limits. A final decision still requires a full-size sample, representative content, realistic brightness, the intended camera setup, and inspection from the nearest position.
| Pixel pitch | Preliminary close-view band | Best-fit role | Relative budget pressure | Main advantage | Main limitation | Approval test |
|---|---|---|---|---|---|---|
| P2.6 | About 2.5–6 m as an early planning range | Close booth face, premium front wall, detailed camera background | Higher | Finer close-range detail and less obvious pixel structure | More pixels to process and a higher system cost than wider pitches | Inspect faces, dark gradients, thin lines, and phone video from the nearest line |
| P2.976 | About 3–8 m as an early planning range | Booth face, medium main wall, mixed-distance club stage | Medium to higher | Balanced detail, modular availability, and area coverage | Pixel structure may remain visible during very close inspection | Test the actual booth height, camera lens, content canvas, and low-bright scenes |
| P3.91 | About 4–12 m as an early planning range | Main background, side surfaces, larger modular stage areas | Medium | Efficient coverage for larger surfaces and event-style structures | Less suitable for a booth directly beside the front standing area | Mark the nearest line on site and review a full-size panel with real content |
Use the nearest viewer, not a simple pitch formula
A basic distance rule can help during early estimates, but it cannot account for every project. Cabinet mask design, contrast, content detail, brightness, audience movement, and camera focus all change the visible result. Therefore, the pitch should be approved through a real visual test rather than a formula alone.
Begin by marking three distances: the nearest standing position, the normal central viewing area, and the most important camera point. Then review the same content at each location. This approach reveals whether a finer pitch creates a meaningful gain or only increases cost.
Compare content that exposes weaknesses
A bright promotional loop makes almost every display look impressive. Instead, the sample playlist should include dark gradients, near-black movement, faces, small logos, diagonal lines, thin type, fast animation, white flashes, and slow colour fades. These scenes expose low-gray banding, visible pixel structure, poor scaling, and uneven modules.
The content should also match the final aspect ratio. A standard 16:9 clip stretched across a low booth canvas may look soft or distorted. Native templates give a more accurate view of the selected pitch and processor path.
Use mixed pitches only with a colour-matching plan
A mixed-pitch layout can direct more budget toward the close booth surface while controlling cost on the background wall. However, two screen families may dim differently or show different blacks. That mismatch becomes obvious when one graphic crosses both surfaces.
Before approval, compare white balance, skin tones, grayscale steps, saturated colours, black level, and camera exposure at the intended operating brightness. The broader indoor LED display planning guide offers additional context on viewing distance, low-bright image quality, processors, and maintenance access.

Where P2.976 fits: This cabinet format is a useful starting point for a medium club stage, a close background wall, or a taller side surface. The final choice still depends on the closest view, cabinet weight, refresh mode, cooling design, and service method.
View P2.976 500×1000 Rental LED Video Wall3. Make Refresh Performance Work with Cameras and Strobes
A high refresh rate LED display can reduce visible bands and flicker in recorded footage. However, one headline number does not describe the complete camera result. Scan configuration, driver behaviour, grayscale mode, controller settings, frame rate, shutter angle, lens choice, and exposure all influence the image.
Nightclub lighting makes that relationship more difficult. Strobes, moving heads, lasers, colour chases, and rapid blackout cues can interact with the display and camera sensor. A stable workshop test may fail once the full lighting show starts, so commissioning must include the real lighting desk and representative cues.
Mobile recording also matters. Short vertical clips often become the main public record of a club night. Therefore, the acceptance test should include common phones as well as production cameras, because automatic exposure and rolling shutters may react differently.
Test the complete chain, not only the panel
The test signal should travel through the intended playback computer, switcher, processor, sending hardware, receiving system, and cabinets. A panel may perform well while a frame-rate conversion or scaling stage creates judder. Likewise, an incorrect output resolution can make sharp content appear soft.
Run the test at several operating brightness levels. Higher output may clip the screen and darken the performer in camera exposure. Lower output may reveal poor grayscale, lifted blacks, colour shifts, or unstable dark detail.
Use a demanding camera test sequence
- Record dark gradients and slow fades to reveal low-gray banding.
- Record white flashes and strobe cues to expose scan interaction.
- Record fine diagonal patterns to reveal moiré and scaling problems.
- Record fast horizontal motion to check judder and frame conversion.
- Record faces beside saturated graphics to balance performer lighting.
- Test normal speed, any required slow motion, livestream settings, and mobile phones.
Review the clips on a proper monitor rather than the camera’s small screen. Dark bands or exposure changes can hide during a quick on-site check. In addition, compare the recorded image with the live stage to confirm that camera corrections do not damage the in-room experience.
Protect the approved operating mode
Once a stable result is found, record the controller mode, input frame rate, output resolution, brightness range, colour settings, camera shutter, and test date. These values should become part of the handover package. Otherwise, a later software change may recreate a problem that was already solved.
The venue should also define who may alter processor settings. Show-critical parameters should not change during routine content updates. A controlled workflow protects both camera performance and consistent colour across the stage.
4. Synchronize Video, Audio and Lighting Without Fragile Workflows
A nightclub display rarely operates alone. Music playback, a lighting desk, media servers, cameras, special effects, and live visual tools may all share timing information. The system should create a clear show workflow without becoming so complex that one missing device stops the stage.
Manual triggering remains useful for flexible DJ sets. A visual operator can follow the music, hold a scene, skip a cue, or react to an unexpected transition. However, manual operation depends on communication and does not guarantee frame-level alignment.
Programmed performances may use SMPTE ST 12 time code, MIDI clock, MIDI notes, OSC, Art-Net, or another agreed protocol. The correct method depends on the audio playback system, lighting console, media server, and touring workflow. Even then, the design needs a manual override and a safe response when timecode disappears.
Name one master timing source
Every programmed sequence should identify the timing master. It may come from audio playback, a dedicated timecode generator, the lighting desk, or a show-control system. Without one master, devices can drift, trigger twice, or recover differently after a pause.
The signal diagram should also show who launches each scene. The lighting desk may send commands to the media server, or the visual operator may trigger presets while the lighting desk follows timecode. Both approaches can work when roles and fallback behaviour remain clear.
Measure visible latency
A small delay may pass unnoticed during slow background loops. By contrast, it becomes obvious when a kick drum, light flash, and screen pulse should land together. The commissioning test should measure the full delay through playback, network transport, processing, and display output.
Audio-reactive graphics need similar discipline. A direct response to every frequency can create restless visual noise. Controlled envelopes, selected frequency bands, and intentional smoothing often produce a cleaner result than uncontrolled beat detection.
Define failure behaviour before opening night
A missing clock or network packet should not create a black stage. The media system should have a defined response, such as holding the last approved frame, switching to a neutral loop, or returning to a preset. The correct response depends on the performance, yet it must be tested.
Essential content should also remain independent from optional effects. If an audio-reactive engine stops, the primary show canvas should continue. This separation reduces the number of faults that can remove the complete visual layer.
Content Synchronization and Backup Checklist
- Identify the master timing source.
- Confirm the trigger protocol between systems.
- Measure visible audio, lighting, and video delay.
- Test manual triggering for unscripted sets.
- Create a stable fallback loop.
- Keep current content on a second playback device.
- Match backup resolution to the approved canvas.
- Store processor files in two locations.
- Label converters, switches, and signal routes.
- Disable automatic updates on show computers.
- Document the approved refresh and colour settings.
- Test a controlled changeover before operation.
A small permanent stage may only need a secondary playback computer and saved processor configuration. A larger installation may require dual media servers, a video switcher, spare sending hardware, and separated network paths. The backup level should follow the impact of a failure rather than a generic package.
The final signal design should follow the actual media server, controller, input count, content canvas, and recovery plan. A simple route that the night team can understand is usually more valuable than a complex diagram with no tested bypass.
5. Control Fan Noise, Heat and Haze Near the Booth
Sound quality defines the room, so the display cannot be evaluated only during a loud performance. Mechanical noise can remain noticeable during sound checks, quiet openings, livestreams, VIP service, or gaps between tracks. A fanless silent LED screen may reduce one source of noise, yet passive cooling still needs a verified path for heat to leave the cabinet and surrounding structure.
The word “silent” should not replace an acoustic test. External processors, media servers, network switches, power supplies, ventilation equipment, loose cabinet parts, and decorative panels may create hum or vibration. Therefore, the complete installation needs inspection from the performer position and nearby microphones.
Booth construction often restricts airflow. Cabinets may sit behind decorative panels, acoustic material, equipment cases, cable trays, or solid furniture. Drinks, clothing, temporary signs, and stored equipment can block openings later, even when the initial installation looks clear.
Plan the thermal route before finishing the booth
The project drawing should show where cool air enters and where warm air leaves. Those paths must remain open after decorative finishing, cable installation, and DJ equipment placement. Hot exhaust should not return directly to the same intake area.
A background wall may need a different strategy. Heat can build inside a narrow rear cavity, especially when the screen runs for long periods beside lighting equipment and media racks. Service corridors need enough space for air movement, safe access, and inspection lighting.
Treat haze as a maintenance condition
Entertainment haze contains fine airborne material that can settle on vents, fans, power units, connectors, and module surfaces. Over time, residue may reduce airflow or attract more dust. A fog or haze outlet should not point directly into a screen cavity or processor rack.
Inspection frequency should follow real operating conditions. A venue running haze every night may need closer checks than a dry rehearsal room. Maintenance should respond to visible residue, rising temperature, fan behaviour, and airflow changes rather than a generic calendar alone.
Use a realistic heat and noise test
A short power-on check cannot reveal gradual heat accumulation. The commissioning run should last long enough to represent the expected show, with representative graphics, lighting, haze, processors, playback equipment, and nearby electronics active.
The content loop should include both dark club visuals and brighter scenes. A dark loop may understate thermal load, while a full-white test may not represent normal operation. A mixed programme gives a more useful picture of how the system behaves through a real night.
Listen during a quiet room condition as well. Fan cycling, cabinet rattle, power-unit hum, and vibration can hide behind music. Low-frequency sound may also loosen trim or handles that seemed secure during installation.
Noise, Heat and Haze Inspection List
- Keep haze outlets away from ventilation paths.
- Confirm airflow after decorative panels are installed.
- Prevent drinks from sitting above booth modules.
- Inspect vents and power areas for residue.
- Check processors and network hardware for fan noise.
- Listen for loose locks, panels, and trim.
- Run a full-length thermal test.
- Record recurring contamination points.
- Store spares in a clean technical area.
- Use only approved cleaning methods.
Product-specific ventilation, operating temperature, and cleaning guidance must be confirmed for the proposed cabinet series. The article does not assume one cooling design, acoustic level, or thermal limit across all products.
6. Design Lightweight Cabinets, Fast Locks and Service Access for Night Work
Club maintenance often happens within a short window after closing or before doors open. Cabinet handling, lock access, cable labels, spare-part compatibility, and service lighting directly affect recovery time. A lightweight LED rental screen can reduce handling effort, although structural decisions must still use verified cabinet data and qualified engineering.
Temporary and touring systems usually value fast locks, repeatable alignment, corner protection, standard looms, and flight-case handling. Permanent installations may value front service, concealed cables, protected ventilation, and low-profile integration instead. The same cabinet should not be selected for both situations without checking the actual working method.
Choose front or rear service by the real access route
Front service helps when the display sits against a solid booth or architectural wall. Modules and internal parts may be removed from the viewing side, depending on the product design. However, the venue still needs the correct tool, safe handling space, and a protected area for the removed module.
Rear service works well when a genuine corridor exists. The corridor should include lighting, ventilation, cable management, safe footing, and enough room for a technician to work without leaning against live equipment. A narrow decorative void does not automatically count as service access.
Some stages need both methods. The booth face may require front access, while the main wall uses a rear corridor. Columns or curved pieces may need removable architectural panels or pull-out sections.
Check fast locks in the finished structure
A fast lock that works easily in an open warehouse may become unreachable behind trim, speakers, truss, or a finished booth. Installation drawings should show hand clearance, lock direction, cable bend radius, and the route used to remove each cabinet.
Lock condition also matters over time. Worn hardware, bent frames, damaged locating pins, and rushed assembly can create seams or unsafe connections. Routine inspection should cover the mechanical system rather than only the illuminated surface.
Build a spare kit around exact compatibility
A spare module should match the actual screen zone, calibration method, mask, and product series. A technically similar part may still produce a visible colour or brightness difference. For mixed-pitch stages, every zone needs a clearly separated spare list.
The kit may include modules, power units, receiving hardware, data cables, power jumpers, masks, lock parts, and the required removal tools. The final list depends on the selected system and venue risk. Every item should carry a clear label and storage location.
Modular rental cabinets can support fast assembly and repeated reconfiguration. Even so, the final choice needs a site-specific review of weight, lock clearance, sound, airflow, structure, cable routes, and the available maintenance window.
| Night maintenance issue | Preferred design response | On-site resource | Acceptance check |
|---|---|---|---|
| Failed booth module | Front service or removable booth panel | Correct tool and calibrated spare | Replace one module without dismantling the console |
| Lost data path | Labelled bypass or redundant route | Spare data cables and saved map | Isolate the fault and restore a stable image |
| Power-unit fault | Reachable compartment and safe isolation | Matching spare and documented procedure | Remove and replace without disturbing nearby zones |
| Visible seam | Accessible locks and alignment hardware | Alignment tools and trained technician | Correct the seam without moving the full wall |
| Lost processor settings | Saved files and documented input map | Offline backup and access permissions | Reload the approved configuration after a controlled reset |
| Haze residue | Reachable vents and inspection points | Approved cleaning materials | Inspect and clean without exposing unrelated components |
The venue should define fault priority. A small defect on a distant side column may wait until closing, while a black section across the booth face may need immediate action. Clear priority prevents unnecessary work during a live set.
Technical permissions should also remain controlled. Only designated roles should open cabinets, change processor settings, or replace power parts. This rule reduces accidental changes and helps preserve the approved configuration.
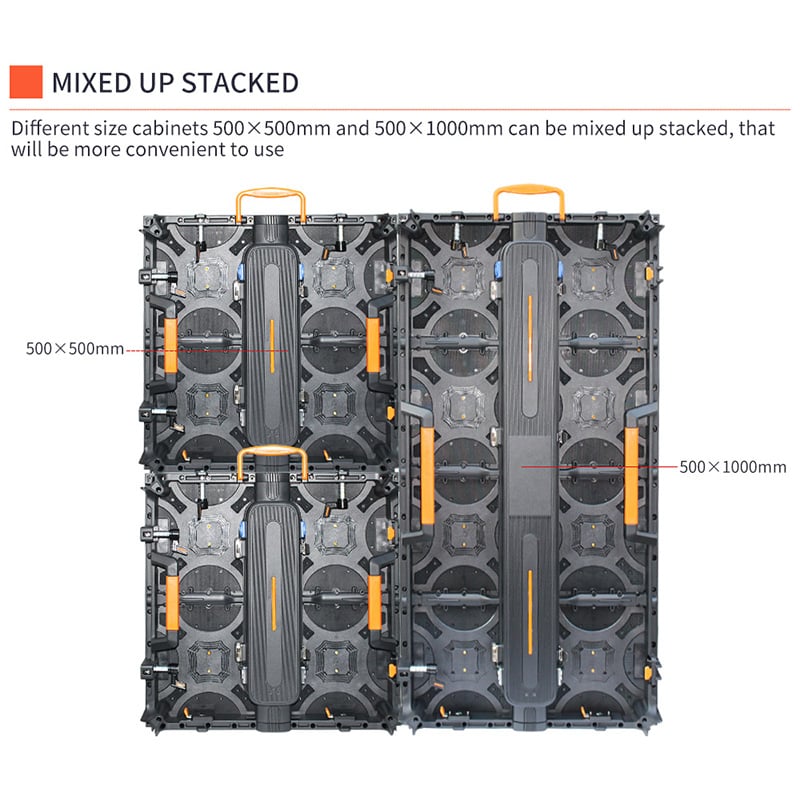
Why mixed cabinet sizes matter: A low booth face and a taller background wall may need different cabinet proportions. Mixed formats can simplify the geometry, but compatibility, locks, data paths, power routes, calibration, and spare parts must be confirmed before approval.
See Quick-Lock Rental Cabinet Options7. Lock the Content Canvas, Backup Plan and Final Acceptance Process
An LED surface rarely matches a standard television frame. A booth may be extremely wide and low, while columns use narrow vertical canvases and a curved wall breaks across several mapped areas. Content should follow the exact pixel map rather than a generic 1920 × 1080 template.
The content team needs a master map showing pixel width, pixel height, cabinet boundaries, curves, blocked sections, and screen splits. This document should also identify whether the main wall, booth, and side surfaces use independent outputs or one large canvas.
Protect text and logos with a real safe zone
Critical information should remain clear of cabinet edges, curves, architectural breaks, and areas blocked by mixers, laptops, monitors, speakers, or performers. The booth face needs special attention because equipment often covers the upper area while audience heads block the lower edge.
Motion speed also matters at close range. Rapid full-screen movement can feel aggressive near the booth. Controlled motion, layered depth, and a clear focal area often create stronger impact without visual fatigue.
Coordinate bright content with stage lighting
Repeated white frames can compete with lighting cues and change camera exposure. High-intensity moments should be planned with the lighting designer rather than added independently. Dark scenes also need review because raised blacks, panel variation, or gradient banding become more visible in a club environment.
Native output should be preserved where practical. Repeated scaling through software, a switcher, and a processor can soften graphics. The media server and controller should follow one documented resolution strategy.
Back up files, mappings and operating knowledge
A spare processor alone does not restore a stage. Mapping files, input assignments, colour settings, refresh modes, firmware records, content templates, and approved playback files must remain available. File names should include a date, screen zone, processor identifier, and approval status.
A printed signal diagram can also save time. During a fault, access to the design software may be unavailable. A simple sheet should show primary input, backup input, switcher routing, processor outputs, screen zones, and emergency changeover steps.
Project information required before final configuration
- Booth width, height, depth, and visible face
- Main and side screen dimensions
- Nearest, normal, and farthest viewing points
- Performer, speaker, lighting, and equipment positions
- Camera positions, frame rates, and slow-motion needs
- Haze, fog, confetti, and cleaning conditions
- Front and rear service clearances
- Rigging or ground-support information
- Power distribution and isolation plan
- Media server, switcher, and playback sources
- Timecode or cue-control method
- Required content canvases and safe zones
- Expected operating schedule
- Maintenance window and technical staffing
- Backup level and spare-part storage
- Installation, rehearsal, and handover dates
Adjust the specification to the operating model
A compact permanent booth usually benefits from simple control and strong front access. The screen may run one branded canvas, a small set of reactive loops, and an emergency input. In that case, service clearance, low-noise operation, protected ventilation, and an easy playback changeover may matter more than touring features.
By comparison, a stage with frequent visiting performers needs standardization. A technical pack should state accepted resolutions, frame rates, input formats, safe zones, content deadlines, and operator responsibilities. Visiting visual teams can then connect without changing the approved processor map or display mode.
A touring setup places more pressure on handling. Repeatable locks, labelled looms, flight-case plans, spare inventory, and quick visual test patterns become central. Even so, speed should not remove the pre-show camera, alignment, and backup checks.
Meanwhile, a livestream-focused venue should treat the camera result as a primary acceptance item. The test needs the production lenses, frame rates, shutter choices, and lighting cues. A display that looks clean to the eye may still create moiré, rolling bands, or exposure conflicts in the recorded programme.
Finally, a large multi-zone club needs clear fault boundaries. The booth, background, and side surfaces should not all depend on one optional creative device. Separated outputs or defined bypass routes can keep the core stage active when an effect engine, secondary switch, or network service stops.
Final acceptance checklist
| Area | What to verify | Evidence to keep |
|---|---|---|
| Viewing and pitch | Nearest-position detail, side-angle colour, low-bright gradients, booth obstruction, mixed-pitch match | Approved sample photos, distance marks, content test file |
| Camera and lighting | Normal recording, slow motion, phones, strobe cues, moiré, rolling lines, performer exposure | Recorded clips and approved camera/display settings |
| Synchronization | Master clock, visible latency, manual override, lost-timecode response, fallback loop | Signal diagram and recovery procedure |
| Noise and thermal | Quiet-room noise, fan cycling, vibration, airflow, heat accumulation, haze outlet position | Test duration, operating conditions, inspection notes |
| Service and spares | Module removal, lock access, cable labels, service lighting, exact spare compatibility | Asset list, spare list, service photos |
| Content and backup | Native canvas, safe zones, current backup media, processor files, controlled changeover | Versioned files, printed map, changeover result |
Which Project Profiles Fit This Approach?
Compact permanent club: A close booth surface, limited rear space, and quiet sound checks make fine pitch, protected airflow, and front service more important than touring features.
Medium venue with booth and main wall: A mixed-pitch layout may control budget while preserving detail at the front. Colour matching and one clear media workflow become the main approval tasks.
Touring DJ production: Lightweight handling, quick locks, labelled looms, repeatable mapping, and a tested spare kit carry more value than deep architectural integration.
Livestream-led entertainment space: Camera tests, strobe compatibility, performer exposure, timecode, and signal backup should lead the specification.
Creative or irregular installation: Exact pixel maps, safe content zones, removable modules, and a realistic service route must be resolved before the shape is approved.
Frequently Asked Questions
Which pixel pitch is best for a DJ booth LED screen?
The decision depends on the nearest viewing point, booth height, content detail, screen size, and camera position. P2.6 often enters the comparison for a very close booth face, while P2.976 may balance detail and project cost in a medium layout.
P3.91 usually fits better on a background or side surface with greater distance. A full-size sample with real content should confirm the final choice.
Why does refresh rate matter in a nightclub?
Refresh performance affects camera bands, flicker, mobile recording, slow motion, and interaction with strobe lighting. However, the result also depends on scan design, grayscale mode, processor settings, frame rate, shutter, and exposure.
For that reason, the display should be tested with the real cameras and lighting cues. The approved settings should then remain documented.
How can an LED screen stay quiet near the DJ booth?
Quiet operation starts with the cabinet, power system, processors, media hardware, airflow route, and surrounding construction. A fanless design may help, but passive cooling still needs clear ventilation.
The complete stage should be checked during a quiet sound test. This check can reveal fan cycling, electrical hum, loose trim, and bass-driven vibration.
What backup should be prepared for live content playback?
A small stage may use a second playback device, saved processor files, spare signal cables, and a neutral fallback loop. A larger production may need dual media servers, video switching, spare sending hardware, and separated network paths.
Every backup must carry the current approved content and configuration. A controlled changeover test should confirm that the route works before operation.
Three Actions Before Final Approval
- Mark the nearest audience and camera positions, then compare P2.6, P2.976, and P3.91 with real content.
- Run a complete camera, strobe, timecode, noise, heat, haze, and backup rehearsal.
- Document maps, settings, spares, access routes, permissions, and overnight recovery steps.
Send booth width, audience distance and controller setup for a stage-screen layout. Adding screen dimensions, service access, camera positions, content canvas, haze conditions, and the expected operating window will make the configuration review more precise.
Contact the project team