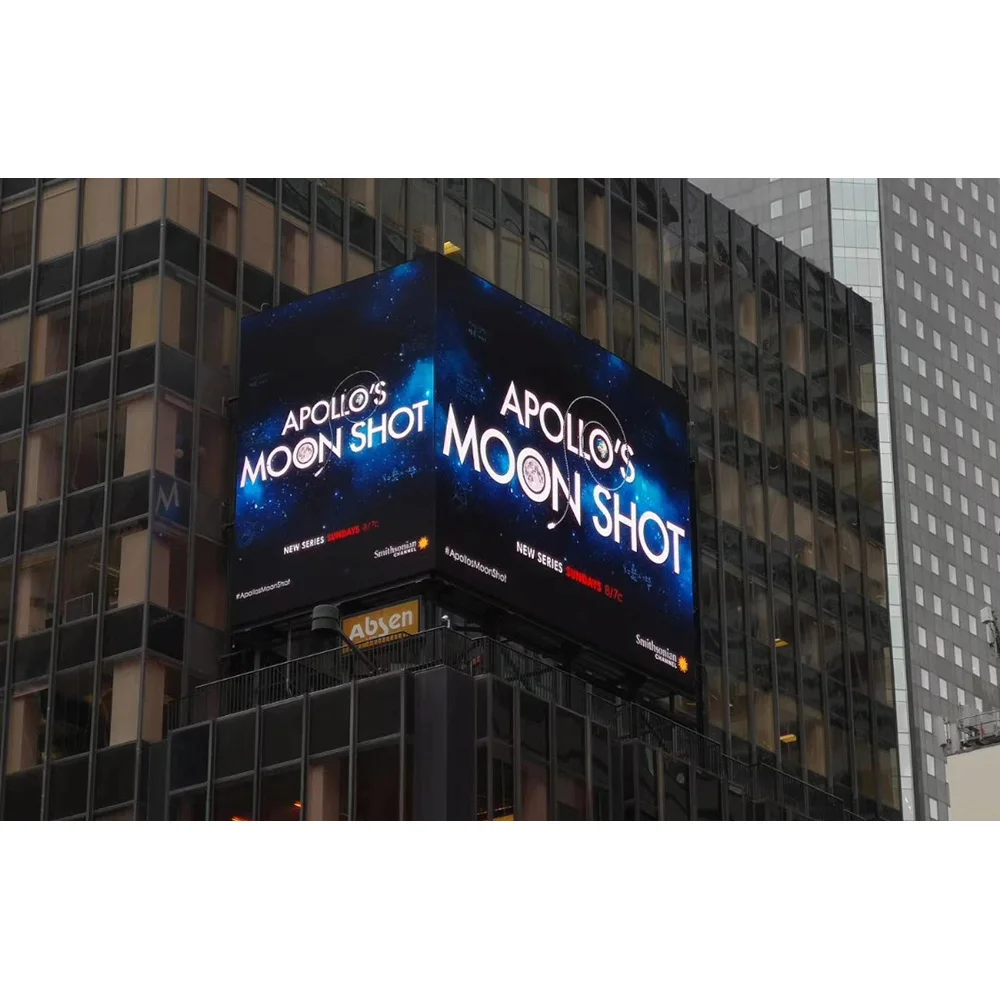
הבנת הרכיבים המרכזיים של תצוגת LED
רכיבים מרכזיים: מודולי LED, אספקת חשמל, כרטיס בקרה, כבלים, מסגרת
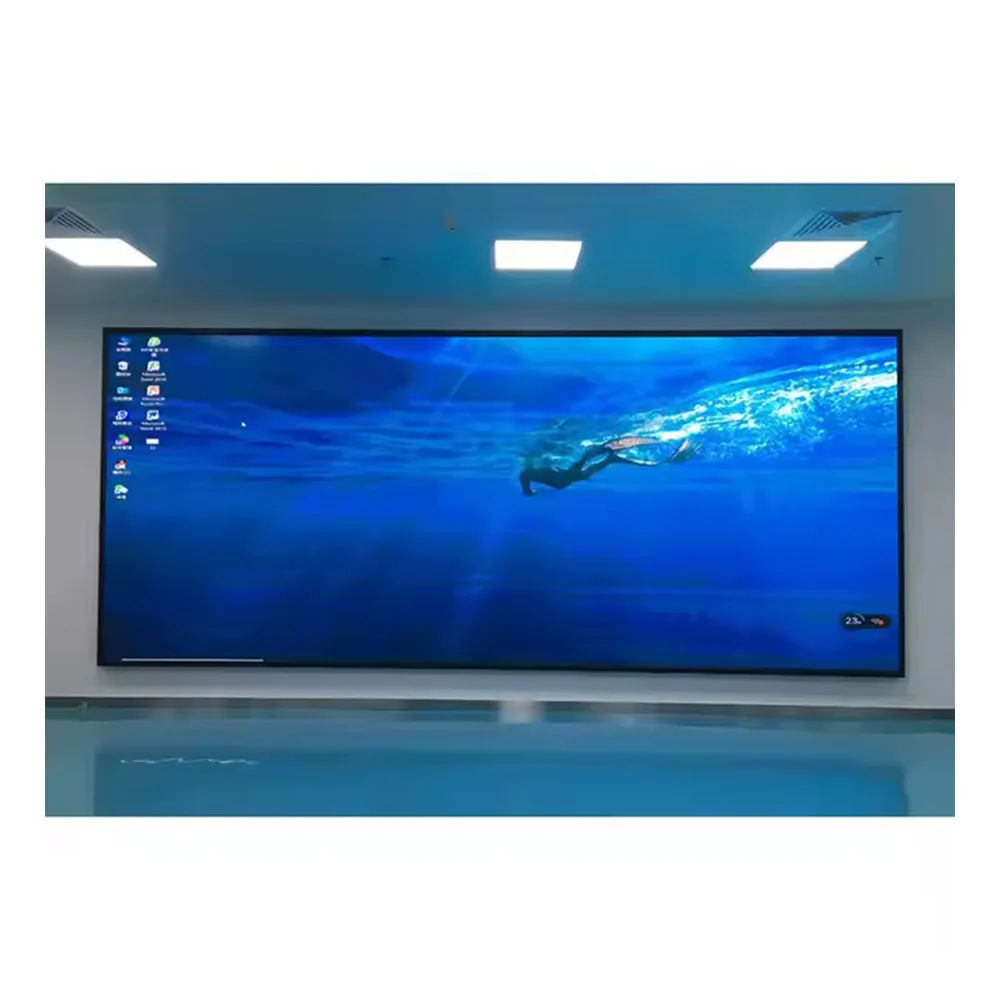
תצוגות LED מודרניות משולבות שישה רכיבים חיוניים: מודולים פולטיפוטונים, תשתיות חשמל, חומרה בקרה, כבלי אות, מסגרת מבנית וarmarios מגנים. מערכות אלו דורשות התאמה מדויקת בין 200–500 רכיבים נפרדים למטר מרובע כדי לאפשר ביצועי תצוגה חלקים.
מודולי תצוגת LED ושונות בעמידת פיקסלים לצורך בקרת רזולוציה
המרחק בין דיודות נורניות בודדות, הידוע בשם עומק פיקסל, ממלא תפקיד חשוב בהגדרת ההפרדה והמרחק שבו אדם צריך להיות כדי לראות פרטים בבירור. כשמדובר על עומק של 2.5 מ"מ, ניתן להשיג תמונות חדה למדי, דומות ל-4K, ממרחק של כ-3 מטרים, מה שמתאים היטב לstudios ייצור פנימיים. לעומת זאת, ערכים גדולים יותר כמו 10 מ"מ עדיין מאפשרים לאנשים לקרוא את תוכן המסך ממרחקים גדולים בהרבה, ולכן מתאימים לתצוגות חיצוניות שבהן הצופים עשויים להימצא במרחק של 30 מטר או יותר. לוחות LED מתקדמים במיוחד מגיעים היום עם טכנולוגיית גווני אפור של 14 סיביות. מה זה אומר? ובכן, בעצם כל פיקסל יכול להכיל יותר מ-16,000 גוונים שונים של צבע. זה מביא לעברות צבע חלקות בהרבה ותמונות טובות בהרבה יחסית לדגמים ישנים.
מערכת בקרה (בקר, שליח וקליטת כרטיסים) פונקציונליות
מערכת הבקרה משתמשת במבנה עיבוד מבוזר שמטפל בכל האותות נתונים המהירים האלה על מסכיים גדולים. כרטיסי השידור מקבלים חיבורים סטנדרטיים של HDMI או DVI ומשנים אותם לזרמי נתונים UDP. הם נשלחים דרך קווי אופטיקה או כבלי CAT6 רגילים אל כרטיסי הקבלה בצד השני. מה שממש מרשים הוא שכל כרטיס קבלה מנהל בין 1,024 ל-4,096 אזורי תצוגה שונים בתוך מודול אחד. הם גם תומכים בערכות רענון של עד 240Hz, מה שמבטיח שלא תהיה פעימות לא נעימה כשמשהו זז במהירות across המסך. ביצועים כאלה חשובים במיוחד ל вещи כמו שידורי ספורט או תוכן וידאו דרמטי, שבהם בהירות בתנועה מהירה היא קריטית לחלוטין.
דרישות אספקת חשמל לתצוגות LED בהתאם לגודל ולבהירות
צריכת החשמל עולה באופן משמעותי עם הבהירות והסביבה:
- תצוגות פנימיות (1,500 ניט): ~40 וואט/מ"ר
- תצוגות חיצוניות (7,500 ניט): ~240 וואט/מ"ר
כדי לשמור על תפעול יציב, ספקי כוח מודולריים מספקים שימור מתח של ±1%, ומספקים 5V DC ליחידות פנימיות ו-48V DC להתקנות חיצוניות. זה מבטיח ביצועים עקביים לאורך ריבויי כבלים שאורכם עולה על 20 מטרים, ללא ירידה משמעותית במתח.
סוגי ארונות להרכבת תצוגת LED: שימושים פנימיים לעומת חיצוניים
התאים החיצוניים עשויים אלומיניום דחיס בדרגת IP65 עם קיר בעובי 5 מ"מ, שעוצב כדי לעמוד בגשמים, אבק וחשיפה ממושכת ל-UV ללא התדרדרות לאורך זמן. ליישומים פנימיים, יצרנים נוטים להשתמש פלדה קלילה בעובי של כ-1.2 מ"מ וכוללים דפנות גישה קדמית כדי שטכנאים יוכלו להכנס למערכת בקלות כשנדרשת תחזוקה. חלק מהדגמים המתקדמים החדשים יותר למעשה משלבים שיטות קירור שונות בהתאם לתנאי הטמפרטורה. מתחת ל-35 מעלות צלזיוס, הם מסתמכים על תנועת אויר סבילית באמצעות הולכה טבעית, אך כאשר הטמפרטורות עולות מעל לערך זה, מאווררים נדלקים כדי לדחוף זרימת אויר נוספת. גישה חכמה זו מקטינה את צריכת החשמל הכוללת בכ-18 אחוז, כפי שצוין בדו"ח תעשיית הניהול התרמי לשנת 2022.
עיצוב פריסת תצוגת ה-LED והמסגרת המבנית
תהליך עיצוב שלב אחר שלב למימדים אופטימליים של המסך וליחס היבטים
בעת הגדרת תצוגה, התחלו על ידי זיהוי המטרות שלה ובאיזו נקודה אנשים יסתכלו עליה בפועל. פנים מבנה? מסך ביחס גובה-רוחב של 16:9 מתאים בצורה הטובה ביותר, כיוון שרוב הסרטונים וההצגות מותאמים לפורמט הזה ממילא. כך הכל נראה נכון, ללא עיוותים או تمוטטויות לא רצויות. בחוץ המצב שונה. מסכים גדולים בדרך כלל משתמשים ביחס רחב יותר, אולי בערך 18:6 או דומה, כדי שאנשים יוכלו לראות אותם בבירור גם ממרחק. אל תשכחו גם את הצד ההארדוארי. יצירת מודל של ת bốיעי הארון בתוכנת CAD עוזר לבדוק אם המבנה יכול לשאת את כל המשקל בצורה נכונה. חשוב לשמור על בטיחות, הן במהלך ההתקנה והן לאורך זמן, כדי לשמור על יישור נכון.
חישוב מספר מודולי ה-LED הכולל הנדרש בהתאם לפITCH הפיקסלים וגודל המסך
כדי לקבוע את מספר המודולים הנדרשים, חלקו את ממדי המסך (במילימטרים) לפי פITCH הפיקסלים. עבור תצוגה בגודל 4 מ' × 2 מ' המשתמשת במודולים עם פITCH של 4 מ"מ:
- רוחב: 4000 מ"מ ÷ 4 מ"מ = 1000 מודולים בשורה
- גובה: 2000 מ"מ ÷ 4 מ"מ = 500 מודולים בעמודה
-
סה"כ: 1000 × 500 = 500,000 מודולים
חישוב זה מבטיח רכש ותכנון תיאום מדויקים.
תכנון פריסה מודולרי באמצעות ארונות להרחבה ושימור
ארגן את התצוגה למקטעי ארונות סטנדרטיים – בדרך כלל בגודל 500×500 מ"מ או 1000×1000 מ"מ – כדי לפשט את ההרכבה והשירות. כל ארון מכיל בין 64 ל-256 מודולים בהתאם לצפיפות הפיקסלים וכולל מנגנוני נעילה הדוקים לצורך יישור מדויק. גישה מודולרית זו מאפשרת תיקונים ממוקדים מבלי לנתק את כל המבנה, ובכך מפחיתה את זמן העמידה ואת הפרעות בתפעול.
הרכבת ארון תצוגת LED והתקנת מודולים
מדריך הרכבה שלב אחר שלב: בניית מסגרת הארונה וחיזוק מסילות ההתקנה
בניית מסגרת עמידה דורשת שימוש בפרופיליות אלומיניום T-slot המתאימות לגודל של כל תצוגה שצריכה תמיכה. יש למקם את התומכות האנכיות במרווחים של עד 16 אינץ' אחת מהשנייה כדי לשמור על יציבות. בעת התקנת שienen ההרכבה, יש להבטיח שימוש בחיבורים עמידים בתהילה כדי שכל הרכיבים ישארו מיושרים תוך סטייה של חצי מילימטר. אם ההתקנה מתבצעת קרוב לחוף או באזור מאוד לח, יש לקחת בחשבון שימוש בפרזות стали מצופות אבקה. מבחני שטח מסוימים מראים שהאלומיניום נוטה להתחמצן במהירות פי שלושה בתנאים אלו, מה שעלול לגרום לבעיות בהמשך אם לא יטופל כראוי במהלך ההתקנה.
התקנת מודולי LED עם יישור מדויק ונעילה אמינה
בעת התקנת מודולים, התחל תמיד מהפינה העליונה השמאלית של כל Schrank. השתמשו בחיבורים המגנטיים שסופקו כי הם באמת עוזרים להזיז את הדברים שוב תוך כמה שניות בלבד. כעת, לצורך חיבור המודולים עצמם, אנו מדברים על שוליים קלאסיים מסוג tongue and groove. לאחר יישור, הסובבו היטב את מנופי הנעילה בכוח של כ-12 עד 15 ניוטון מטר כדי להבטיח חותם מתאים למניעת חדירת אבק. ואל תשכחו גם מה khoảng בין הלוחות – השאירו רווח של כ-0.2 עד 0.3 מילימטר על ידי הוספת מפרידים פלסטיים קטנים. זה אולי נראה כמו חלוקת שערות, אבל האמין לי, זה חיוני כשמדובר בשינויי טמפרטורה שמתפתחים ממינוס 30 מעלות צלזיוס ועד 50 מעלות. אחרת, כל המערכת עלולה להתעוות או לשבור עם הזמן.
הבטחת הגנה סביבתית: חותמים ו_SZELLUNG בעיצוב ארונות
כדי למנוע הצטברות מים בתוך armories, כדאי להאטם את המפרקים באמצעות אום סיליקון עם דירוג של IP65. גם ערוצי ניקוז שמתאימים לתקן NEMA 4X הם שווים לשקול. לצורך אוורור, התקנת מאווררים בשליטה PWM עם קצב של לפחות 25 CFM יחד עם מסננים מסוג MERV 13 יוצרת לחץ חיובי בתוך ה-armory. הקבוצה הזו עוזרת לשמור על אבק בחוץ, מה שפירושו פחות ניקיון לאורך זמן. מחקרים מסוימים מראים שגישה זו יכולה למעשה לצמצם בהוצאות תחזוקה בצורה משמעותית, אולי בכ-שליש בסביבות מסחריות. כעת, אם מדובר באזורי חום יבשים, הוספתpads של קירור איבוארייבטי למערכת התעלות אוורור נותנת תוצאות מצוינות. הם עוזרים לשמור על טמפרטורות פנימיות מתחת ל-40 מעלות צלזיוס גם בתנאים קיצוניים בחוץ.
חיווט, הפצת חשמל ואינטגרציה של מערכת בקרה
חיווט וחיבורים: חיבור מקורות חשמל למודולי LED באופן בטיחותי
כשמדובר בהפעלת תצוגות, תמיד השתמשו בכבלים שמופיעים ברשימת UL ויכולים לעמוד בדרישות הכוח של ההתקנה. ראינו יותר מדי בעיות שנגרמות מחיווט קטן מדי, מה שבעצם גורם לכ-37% מתקלות חשמל בסביבות ייצור, לפי דוחות שדה. למען הבטיחות, ודאו שהספקים מחוברים למודולים באמצעות מופסקי חיבורים קוטביים שמונעים בעיות של הפיכת קיטב. ואל תשכחו ממכלכי ניגוב מתח בכל נקודה שבה כבלים נכנסים לארונות ציוד. הכלים הפשוטים האלה באמת עושים את ההבדל במניעת בلى וחוסר יציבות בחיבורים לאורך זמן, במיוחד בסביבות שבהן יש רעידות.
הפצת מתח אחידה בין המודולים כדי למנוע ירידת מתח
השימוש בתצורת כוכב להפצת חשמל הוא האופטימלי כאשר מריצים כבלים באורכי שוויון מנקודה מרכזית אחת לכל המודולים. תצורה זו עוזרת לשמור על הפרשי מתח נמוכים ועוצרת את הנקודות הכהות המטרידות שמופיעות במסכים הנמצאים רחוק מהמקור. כשמדובר במסכי תצוגה גדולים מעל 10 מטר רבוע, הגיוני לפזר את העומס החשמלי בין מספר ספקי כוח של 40 אמפר עם הגנות מובנות מפני עומס יתר. כדי לבדוק אם כל המערכת פועלת כראוי, יש למדוד את המתח במודול הרחוק ביותר ממקור החשמל. ברוב ההתקנות יספיקו מדידות אלו שיישארו בתוך טווח של כ-5% מעל או מתחת לרמות המתח הנורמליות.
איפוס והגנה מפני סיער להתקנת מסכי LED בחוץ
מערכות חיצוניות חייבות להשיג התנגדות אדמה של ≤5Ω, בהתאם לתקני IEEE 142-1991, כדי לצמצם סיכוני ברקים. יש להתקין מגני העМО מסוג 1 בזנת החשמל הראשית ומagli התקניавת מתח (TVSS) בצמתים של המודולים. נתוני שטח משנת 2023 מראים שתצוגות properly grounded סובלות ב-83% פחות כשלים הקשורים לעומסי חשמל בהשוואה לאלה שאינן properly grounded.
הגדרת כרטיסי שליחה וקבלת במערכת הבקרה
כרטיסי שליחת וידאו פועלים על ידי המרת אותות וידאו נכנסים לחבילות מידע עם זמנים מדויקים שיכולים לנוע דרך הרשת. בעת הגדרת המערכת, חשוב לבדוק כמה פיקסלים כל כרטיס יכול להתמודד בו-זמנית (למשל בערך 1.3 מיליון פיקסלים) ולבדוק שזה תואם את מה שהתצוגה צריכה להציג בפועל. בהתקנות הכוללות מספר קabinות מחוברות יחד, כל כרטיסי הקבלה חייבים להיות מסונכרנים באמצעות אותות שעון RS-485. ללא סנכרון תקין, דברים מתחילים להשתבש במהירות – התמונות עשויות להתפצל באמצע המסך או לרצד בצורה מטרידה, מה שאיש לא רוצה לראות במהלך מצגות או אירועים.
חיבור כרטיס הבקר לפלטפורמות תוכנה לצורך אספקת תוכן
בימינו בקרים עובדים עם תקנים תעשייתיים כמו Art-Net ו-sACN כדי להעביר תוכן ברשת במהירות ובלי השהיה. הקצו להתקן כתובת IP משלו בתוך טווח הרשת המקומית, כך שיהיה לו מקום משלו ברשת. לאחר מכן, בדקו את מהירות העברת הנתונים מנקודה A ל-B באמצעות כלי אבחון שרוב הבקרים מגיעים איתם. המטרה היא זמן תגובה של פחות מ-50 מילישניות, כדי לוידאו ירוץ בצורה חלקה ללא התנתקויות. בהרבה התקנות בימינו משתמשים ב-API כדי להתחבר למערכת ניהול תוכן, מה שמאפשר למשתמשים לתזמן쇼 באופן אוטומטי ולשדר עדכונים מכל מקום, במקום להיות חייבים להיות במקום בכל פעם שיש צורך לשנות משהו.
בדיקת קליברציה ושימור מתמשך של תצוגת ה-LED
בדיקות וקליברציה: אימות אחידות צבע ורמות בהירות
בצע כיילול של התצוגה באמצעות ספקטרורדיומטרים למדידת עקיבות צבע ובהירות בכל המודולים. הצג דפוסי בדיקה מלאים ותקן עקומות גמא דרך תוכנת הבקרה כדי לתקן סטיות. הקם מחזורי כיילול רבעוניים להתקנות חיצוניות ולוחות שנתיים ליחידות פנימיות כדי לפצות על שחיקת הסביבה וגילוי ה-LEDs.
אבחון תקלות נפוצות: פיקסלים מתים,กะבוקבים, איבוד אות
בחן פיקסלים מתים באמצעות כלים מובנים לאיתור טעויות לפני החלפת מודולים פגומים. בדוקกะבוקבים על ידי בדיקת יציבות מתח לאורך מסילות החשמל – סטייה גדולה מ-5% מצביעה על כשל בمنظم. טפל באיבוד אות על ידי חיבור מחדש של מפגשי כרטיסי קבלה והבטחת שלמות הכבלים המושilded מסוג CAT6, במיוחד בסביבות עם רעש חשמלי.
טיפים לתחזוקה שוטפת לביצוע ארוך טווח של תצוגות LED
בדיקות חודשיות באינפרא-אדום עוזרות לזהות כתמים חמים מolestים לפני שהם גורמים לבעיות, בעוד שפיחוץ אבק מנתיבי האוויר באמצעות כ-20 psi של אויר דחוס שומר על ריצה חלקה. גישה מודולרית גם היא מקלה על החיים, שכן הטכנאים יכולים לעבוד על Schrank מסוים מבלי להפסיק את כל התפעול. עם זאת, חשוב לשמור על everything מתועד במקום מרכזי אחד. מערכת רישום טובה עוקבת אחר תאריכי החלפת חלקים, תדירות בה יש להחליף ספקים, וכל התחזוקות המתוכננות, כדי שהבודקים יידעו מה בוצע והמערכות ישארו אמינות לאורך זמן.
שיטות עבודה מומלצות לניקוי, בדיקה והחלפת רכיבים
לפניות תצוגה, קחו מיתחני ניגוב אנטיסטטיים שספוגים ב-70% אלכוהול איזופרופיל וניגבו אותם במקביל מלמעלה למטה. זה עוזר לשמור על לחות שלא תחדור לרכיבים רגישים. באזורים שבהם יחס הלחות מהווה בעיה, החליפו את החיבורים המאובטחים פעם בשנה. ואל תשכחו לבדוק את מגני העומס כל חודש במהלך סערות. מפעילים חכמים שומרים תמיד על מלאי נוסף של כ-15% של חלקים חשובים כמו כרטיסי בקרה ומעגלי נהן קטנים.حياבון אלו בהישג יד פירושו פחות זמן השבתה כשמשהו נשבר במיקומים עתירי פעילות או במערכות שאינן יכולות להרשות לעצמן הפסקות.
שאלה נפוצה
מהו עמיד הפיקסלים במסכי LED?
עמיד הפיקסלים מתייחס למרחק בין פיקסלים בודדים של LED על המסך. הוא קובע את הרזולוציה ואת גובה התצוגה באשר לנראות ברורה של מסך LED.
למה משתמשים בסוגי ארונות שונים למסכי LED פנימיים וחיצוניים?
ארונות חיצוניים משתמשים באלומיניום מוזק שדרגתו IP65 כדי לעמוד בתנאי מזג אוויר קיצוניים, בעוד שארון פנימיים משתמשים בפלדה קלילה יותר לקלות בשימור והתקנה.
איך עובד מערכת הבקרה של תצוגת LED?
מערכת הבקרה מורכבת מкарт שליחה וקבליה, המרהירות את אותות הווידאו לזרמי נתונים. כרטיסים אלו מנהלים אזורים מרובים בתוך מודולים לביצועי תצוגה אופטימליים.
למה חשוב הארקה לתצוגות LED חיצוניות?
הארקה נכונה מפחיתה את הסיכון לנזק מקנס ותקלות עקב סיעור. התקנות חיצוניות צריכות להגיע לרמות התנגדות אדמה מסוימות בהתאם לסטנדרטים התעשייתיים.