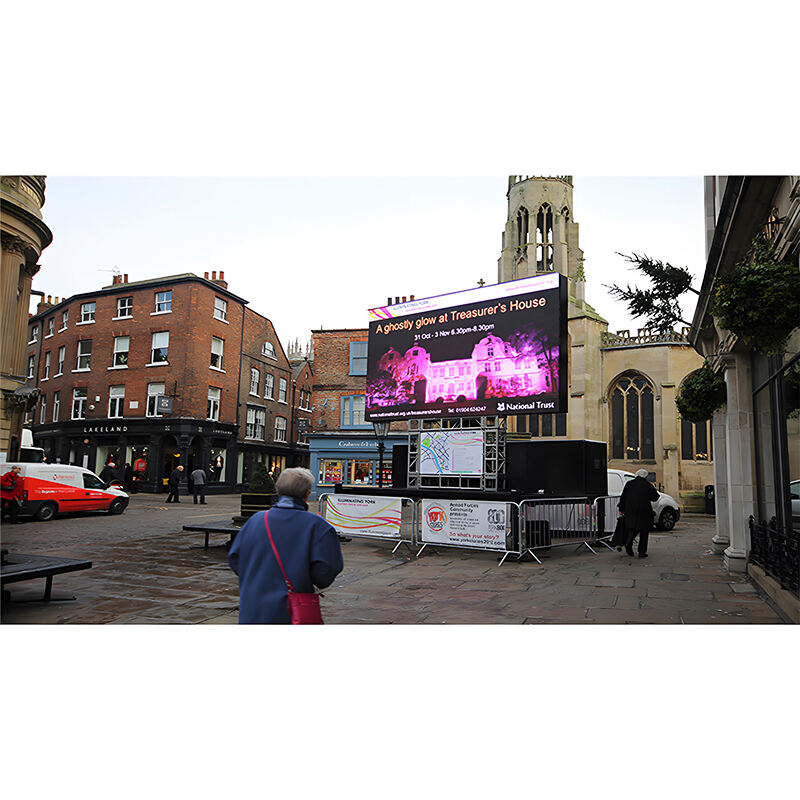
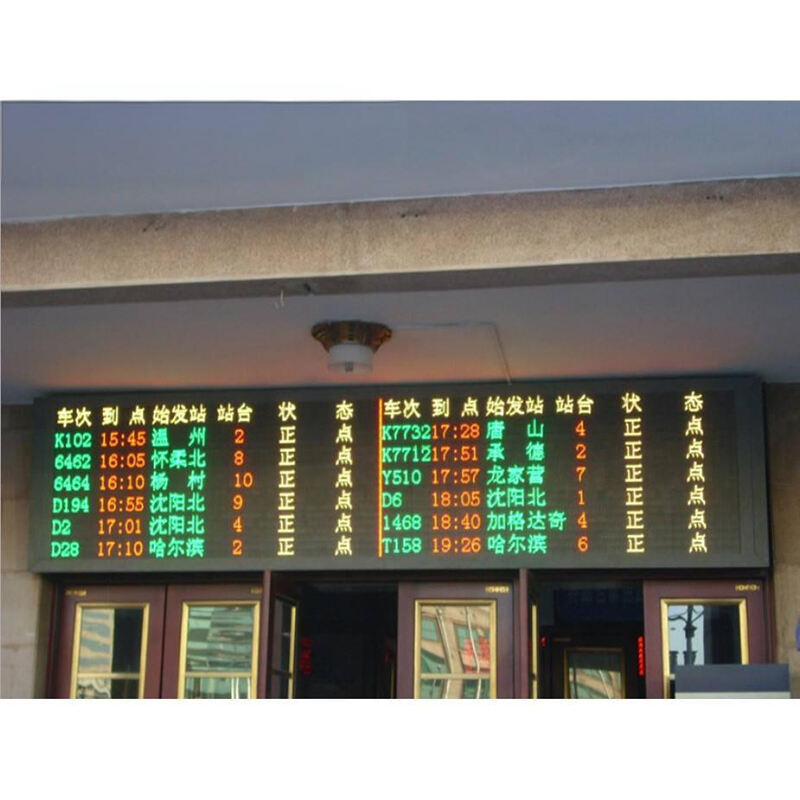
Ծանոթանալ Ամպրոպապատվաստ ցուցադրման սարքի հիմնարար բաղադրիչների հետ
Ամպրոպապատվաստ ցուցադրման համար անհրաժեշտ բաղադրիչներ
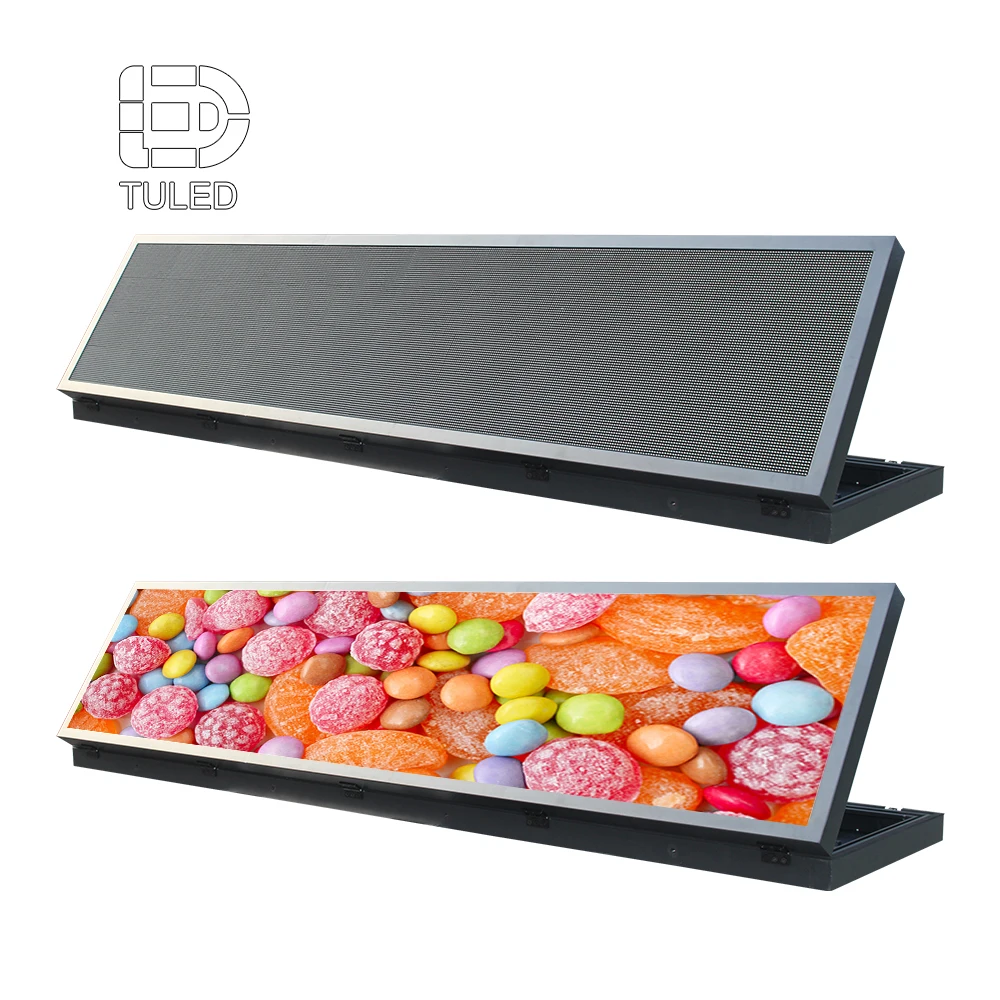
Բոլոր Ամպրոպապատվաստ ցուցադրումները հիմնականում պետք է հինգ հիմնական մասեր լինեն միասին աշխատում. այդ Ամպրոպապատվաստ մոդուլները իրենք, հուսալի էլեկտրամատակարարման աղբյուր, մի տեսակ վերահսկիչ տախտակ, ամուր շրջանակ, որը պահում է ամեն ինչ տեղում, ինչպես նաև բոլոր անհրաժեշտ միացնող լարերը: Ամպրոպապատվաստ մոդուլները հիմնականում փոքրիկ լույս արտանետող դիոդների խմբավորումներ են, որոնք տեղադրված են տպագրական շղթայի վրա: Այդ մոդուլների վրա տեղավորված պիքսելների քանակը կախված է ցուցադրման ցանկալի հնարավորությունից, սովորաբար մեկ քառակուսի մետրում տասը հազարից մինչև հիսուն հազար պիքսել: Արդյունաբերական կիրառումների դեպքում սովորաբար օգտագործվում են էլեկտրամատակարարման աղբյուրներ, որոնք կարողանում են ապահովել հաստատուն հոսանքի 5 վոլտ առանց ցանկացած տատանումների: Վերահսկիչ տախտակները ևս կատարում են ծանր աշխատանք, վերցնելով համակարգչից ստացված ցանկացած հաղորդագրություն և այն թարգմանելով ցուցադրման համար ըմբռնելի տեսքի, օգտագործելով տարբեր կապի ստանդարտներ, ինչպիսին են DMX-ն կամ հին լավ Ethernet-ը:
Ընտրել ճիշտ LED մոդուլները
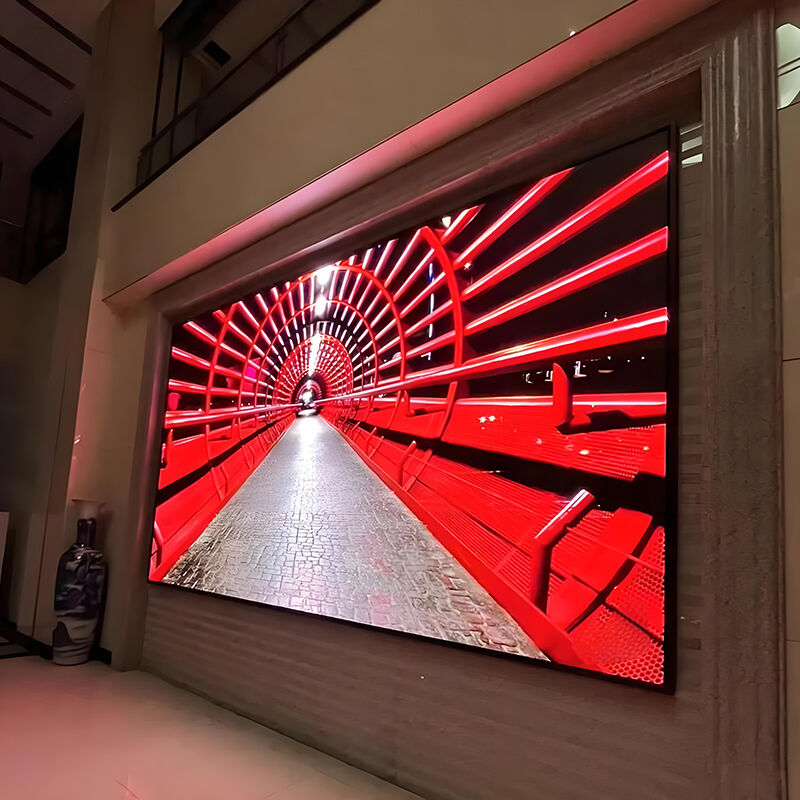
Փիքսելների միջև եղած հեռավորությունը, որն իր էությամբ մի լույս արձակող դիոդի կենտրոնի և մյուսի միջև եղած հեռավորությունն է, խաղում է մեծ դեր, թե ինչքան հստակ կլինի էկրանի պատկերը: Երբ տնային ցուցադրումներ են կատարվում, շատ մարդիկ համարում են, որ 2մմ-ից 5մմ փիքսել միջակայք ունեցող մոդուլներն ավելի լավ են աշխատում 10 ոտքային հեռավորության վրա նստած դիտորդների համար: Կարևոր է նաև պայծառությունը: Ցուցադրումները, որոնք գնահատված են 800-ից 1500 նիտների միջակայքում, հարմար են նաև այն դեպքերում, երբ պատուհաններից մեծ քանակությամբ արև է մտնում, իսկ նորմալ ներքին օգտագործման ընթացքում աչքերը չեն հոգնում: P3 կարգավիճակի բարձր խտության տարբերակներ ընտրելը անպայման ավելի հարթ կդարձնի պատկերը, քանի որ լույսերի միջև եղած միջակայքերը ավելի քիչ են նկատվում: Այնուամենայնիվ, այս նախընտրելի մոդելները սովորաբար 40 տոկոսով ավելի թանկ են լինում ստանդարտ P6 տարբերակներից, այդ իսկ պատճառով բյուջեն հաճախ կարևոր դեր է խաղում ցուցադրման տեխնիկական բնութագրեր ընտրելիս:
Ընտրել համատեղելի սնուցման աղբյուրը
Հաշվարկեք ընդհանուր հզորությունը՝ մոդուլների քանակը բազմապատկելով առանձին սպառողական հզորությամբ (սովորաբար 15Վտ–30Վտ մեկ 320x160մմ մոդուլի համար): Ավելացրեք 20% ռեզերվ՝ լարման տատանումների դիմաց կայունություն ապահովելու համար. 750Վտ ընդհանուր հզորությամբ 50 մոդուլից բաղկացած ցուցադրման համար պետք է օգտագործվի 900Վտ սնուցման աղբյուր: Կրկնակի ռեզերվային սնուցման համակարգերը նվազեցնում են անջատման վտանգը՝ ավտոմատ անցնելով պահուստային սարքերին անջատումների դեպքում:
Կառավարիչի քարտի դերը
Կառավարման քարտերը համակարգիչների և LED վահանակների միջև կապի կետ են ծառայում, այդ հեռարձակման HDMI կամ USB իմպուլսները վերածելով այնպիսի տեսքի, որի հետ էկրանը կարող է աշխատել: Այսօրվա համար բարձրորակ կառավարիչները կարող են կեղծել թարմացման հաճախականությունը մինչև 3840 Հց, ինչը մոտ ութ անգամ ավելի շատ է, քան ինչպես մեծամասնության 60 Հց հեռուստացույցներն են ցուցադրում: Դա տեսանյութերին հնարավորություն է տալիս հարթ տեսք ունենալ առանց ցնցումների: Որոշ ավելի լավ մոդելներ ունեն նաև ներդրված անջատման համակարգեր: Երբ ազդանշանի թուլացում կամ ընդհատում է լինում, այդ համակարգերը ավտոմատ կերպով միանում են, որպեսզի ամեն ինչ շարունակի աշխատել: Այս հնարավորությունը շատ կարևոր է խոշոր միջոցառումների համար, երբ էկրանները չեն կարող անսպասելի անջատվել:
Աղյուսակ. Կոմպոնենտների համատեղելիության ուղեցույց
| Komponent | Հիմնական բնութագրեր | Տնային օգտագործման պահանջներ |
|---|---|---|
| LED Մոդուլներ | Պիքսելային հեռավորություն | 2մմ-5մմ |
| Էլեկտրամատակարարում | Հզորության պաշար | +20% ընդհանուր բեռից |
| Կառավարման քարտ | Ծայրամասային աջակցություն | HDMI 2.0 + USB-C |
| Շրջանակի նյութ | Грузоподъемность | 1.5x էկրանի քաշ |
Այս շրջանակը տեխնիկական ճշտությունը համատեղում է տնային տեղադրման պրակտիկ կարիքների հետ՝ ստեղծելով հուսալի աշխատանքի հիմք Ալիքային տեսադաշտի համար:
Ալիքային տեսադաշտի տախտակի հավաքում. քայլորեն ուղեցույց
Ալիքային մոդուլների միացում դեպի վերահսկիչ քարտը և հոսանքի մատակարարումը անվտանգ եղանակով
Սկսեք այդ ԱԼԵ մոդուլները ճիշտ ձևով շարադրել շրջանակի վրա, որպեսզի վարագույրների միջև ցանկացած անհարմար միջակայք չլինի: Հաջորդ քայլը վերահսկիչ քարտը մի կենտրոնական տեղում ամրացնելն է, որտեղ հեշտ է հասնել, եթե հետագայում անհրաժեշտ է լինի բաները ճշգրտել: Այս մասի համար օգտագործեք լավ որակի ամրացման բազկակալներ: Երբ այդ բոլոր մոդուլները միացնում եք վերահսկիչ քարտին, համոզվեք, որ օգտագործում եք CAT5e տվյալների կեբլներ և հսկում եք բավարար մասշտաբով ամբողջ համակարգում, որպեսզի ազատվեք սիգնալային խնդիրներից: Բոլոր բաները միացնելու համար վերցրեք հուսալի 5Վ/20Ա սնուցման միավոր: Կրկնակի ստուգեք, որ ընդհանուր վատտայինությունը համընկնում է այդ մոդուլների կողմից միասին վերցված մեծության հետ: Որպես մոտավոր ուղեցույց, մեծամասամբ ներքին ցուցադրումները սպառում են շուրջ 8-ից 12 վատտ քառակուսի ոտքի վրա, սակայն էլեկտրական բաների դեպքում ավելի լավ է անվտանգ լինել, քան ցանկացած սխալ:
ԱԼԵ բաղադրիչների միացում. Հոսանքի և տվյալների կեբլների ճիշտ միացում
Կաբելների կազմակերպում նայլոնե ժապավենների միջոցով՝ կապումների վրա ճնշումը և բարդացումը նվազեցնելու համար: Սխալներից ազատ հավաքման համար հետևեք հետևյալ հաջորդականությանը.
| Քայլ | Գործողություն | Հիմնարար համարվող գործոն |
|---|---|---|
| 1 | Միացրեք սնուցման կաբելները LED-ին | Համընկնող +/- եզրերը խուսափելու համար կարճ միացումից |
| 2 | Կապեք տվյալների կաբելները վերահսկիչի հետ | Ամրակցեք RJ45 կոննեկտորները ամուր |
| 3 | Հողանկայներ մետաղյա շրջանակի մասերը | Կանխում է էլեկտրական միջերկրային միջամտությունը |
Օգտագործեք սիլիկոնե պատյանով կաբելներ արտաքին տեղադրման համար և բոլոր փողային միացումները ստուգեք մուլտիմետրով:
LED մոդուլների տեղադրում շրջանակին կոնստրուկտիվ կայունության համար
Կառուցեք թեթև ալյումինե շրջանակ, որը համընկնում է օգտագործվող էկրանի չափի հետ: Տնային նախագծերի համար հաճախ կիրառվող չափը կարող է լինել մոտ 2 ոտք առ 4 ոտք, սակայն սա կախված է կոնկրետ պահանջներից: Մոդուլները միմյանց միացնելիս կարևոր է օգտագործել M4 չժանգոտվող պողպատե պտուտակներ: Տեղադրման ընթացքում կիրառեք առավելագույնը 0.2 նյուտոն մետր մոմենտ (Nm), քանի որ ավելորդ ուժը իրականում կարող է վնասել տպագրված շղթան: Կորացված էկրաններ ներառող տեղադրումների դեպքում լավագույնս աշխատում են ճկուն նայլոնե պարանոցները: Այս հատուկ պարանոցները յուրաքանչյուր մոդուլի հատվածների միջև ապահովում են մոտ 15 աստիճանի ճկում, որը օգնում է պահպանել ճիշտ հավասարեցումը՝ անգամ ոչ գծային մակերեսների դեպքում: Ամբողջական հավաքածուից հետո միշտ կրկնակի ստուգեք միացումները՝ ապահովելու համար, որ ամեն ինչ ամրագրված է և կայուն է ժամանակի ընթացքում:
Առանձին բաղադրիչների ստուգում ամբողջական ինտեգրումից առաջ
Ամեն մոդուլ միացրեք առանձին, որպեսզի հայտնաբերեք անսարք LED-ները կամ միացիչները: Օգտագործեք փորձարկման նախշի գեներատոր՝ համոզվելու համար, որ գունային համասեռությունը պանելների վրա համապատասխանում է պահանջներին՝ պանելների միջև լուսավորության տատանումը <5% է: Համոզվեք, որ տվյալների հաղորդումը իրականացվում է ճիշտ՝ վերահսկման սարքի միջոցով տեսանյութի փորձարկման ֆայլ ուղարկելով հավաքակցման ավարտից առաջ:
Նշում. Վարդապետական հղումները տեղադրման համար նախատեսված տեղեր են: Փոխարինեք հեղինակային աղբյուրներով, որոնք համապատասխանում են ձեր նախագծի մասշտաբին:
LED Էկրանին համակարգիչ միացնել. Ինտերֆեյսներ և Կարգավորում
Տվյալների Միացումը իրականացնել USB, HDMI կամ Ethernet միջոցով Իրական Ժամանակում Կառավարման Համար
Այսօրվա LED էկրանները համակարգիչներին միանալու համար ապահովում են երեք հիմնական միջոցներ՝ USB, HDMI և Ethernet միացումներ: USB 3.0 պորտը հնարավորություն է տալիս մարդկանց, ովքեր պարբերաբար կարիք ունեն թարմացնելու հիմնական տեղեկատվությունը: HDMI-ը հիանալի է, քանի որ այն առանց խնդիրների բարձր հնարավորություններով տեսանյութեր է փոխանցում, ինչը շատ կարևոր է մասնագիտական ներկայացումների համար: Երբ խոսքը բազմաթիվ էկրանների հեռացված կառավարման մասին է, Ethernet-ը դառնում է շատ օգտակար, քանի որ թույլ է տալիս կառավարումը ցանցերի միջոցով: AVIXA-ի 2023 թվականի վերջին հետազոտության տվյալների համաձայն, մարդկանց տասնից ինը LED էկրաններ ստեղծելիս ընտրում են HDMI-ն, քանի որ ամենօրյա համակարգչային գրաֆիկական քարտերը հիանալի աշխատում են այդ միջոցով: Եվ եթե մեկին անհրաժեշտ է բիզնես նպատակների համար իսկապես հուսալի լուծում, ապա CAT6 Ethernet կեբլների օգտագործումը կրճատում է ուշացումը մոտ քառասուն տոկոսով, համեմատած անջատ տարբերակների հետ, ինչը դրանք արժեքավոր տարբերակ է դարձնում՝ ամբողջ ավելի բարձր սկզբնական գնի դեպքում:
HDMI և USB կեբլների միացումը համակարգիչի և LED էկրանի կառավարիչի միջև
- HDMI-ի կարգավորում : Մի ծայրը միացրեք ձեր PC-ի HDMI հետ, իսկ մյուսը՝ վերահսկիչի մուտքին: Համոզվեք, որ վերահսկիչի EDID-ն համընկնում է ձեր PC-ի թույլատրելի լուծաչափի հետ:
- USB-ի ինտեգրում : Օգտագործեք USB-B-ից USB-A անցումային կեբլը վերահսկիչը PC-ին միացնելու համար: Սա աջակցում է հիմնական ֆիրմային թարմացումներին և ցածր բիթային հաճախականությամբ տվյալների փոխանցմանը:
| INTERFACE | Լավագույն օգտագործման դեպք | Առավելագույն տվյալների փոխանցման արագություն |
|---|---|---|
| USB 3.0 | Ֆիրմային թարմացումներ, տեքստ | 5 ԳԲ/վրկ |
| HDMI 2.1 | Տեսանյութերի վերարտադրում, անիմացիաներ | 48 ԳԲ/վրկ |
| Էթերնետ | Հեռակառավարում, մեծ ցանցեր | 10 Գբիթ/վ |
Տեսաքարտի սարքավորումների օգտագործումը համակարգիչների և LED էկրանների արդյունավետ միացման համար
Տեսաքարտերը հիմնականում հանդես են գալիս որպես միջնորդներ՝ միացնելով համակարգիչները LED էկրանների հետ և թարգմանելով թվային ազդանշանները էկրանի վրա տեսանելի պատկերի: Վերցրեք, օրինակ, NovaStar MX40-ն, այս մոդելը 4K թույլատրում է բավարար հարթությամբ և թույլ է տալիս օգտվողներին իրական ժամանակում կարգավորել լուսավորությունը PWM տեխնոլոգիայի միջոցով: Սակայն ընտրելիս քարտը, շատ կարևոր է համընկնեցնել մշակման հզորությունը էկրանի պահանջների հետ: Բարձր պիքսելային թվով էկրանները պահանջում են հզոր հաշվողական հնարավորություններ իրենց քարտերից: Հակառակ դեպքում մենք տեսել ենք դեպքեր, երբ ավելի էժան կամ թույլ քարտեր չեն կարողանում հետևել, ինչի արդյունքում առաջանում է նեղացնող ուշացում կամ էլ էկրանի մարում ներկայացման ընթացքում:
Համակարգիչների և էկրանի քարտերի միջև հաճախադեպ հանդիպող միացման խնդիրների վերացումը
- Սիգնալ չկա : Ստուգեք միացման ամբողջականությունը և ստուգեք վարիչների հակասությունները սարքերի կառավարիչներում:
- Մարող ելք : Փոխարինեք ցածր որակի HDMI կեբլները կամ իջեցրեք թարմացման հաճախականությունը 120 Հց-ից մինչև 60 Հց:
- Սահմանափակ ժամանակահատվածներ Ethernet-ի համար : Ապաակտիվացրեք UDP 5000 պորտի վրա կատարված կրակուղղուրդի սահմանափակումները, որոնք հաճախ օգտագործվում են LED կառավարման սարքերի համար:
Կառավարիչի ծրագրակազմի կարգավորում LED ցուցիչների կառավարման համար
LED ցուցիչի կառավարման ծրագիր. Տեղադրում և սկզբնական կարգավորում
Սկսելու համար LED ցուցադրման հետ, տեղադրեք ղեկավարման ծրագրաշարը այնպես, ինչպես առաջարկում է արտադրողը, սովորաբար իրենց կայքէջից ներբեռնման միջոցով կամ, հնարավոր է, ներառված սկավառակի կամ USB թուղթի միջոցով: Շատ դեպքերում սկզբում պետք է մուտքագրել հիմնական տեղեկությունները, օրինակ՝ էկրանի չափը, ինչպես 1920x1080 փիքսելները, որոնք հարմար են շատ դեպքերում: Հետո պետք է հասկանալ, թե քանի մոդուլից է բաղկացած ամբողջ կառուցվածքը՝ սովորաբար չորսից մինչև տասներկու վահանակ, կախված նրանից, թե ինչքան մեծ է ցուցադրությունը: Կարևոր է նաև փիքսելների միջև եղած հեռավորությունը (pixel pitch), փոքր ցուցանիշները, ինչպես P2.5-ից մինչև P10-ն են, հաճախ լավ ընտրություն են տնային տեղադրումների համար: Ցանցային կարգավորումները նույնքան կարևոր են: Կառավարիչները պետք է ստանան ճիշտ IP հասցեներ, ինչպես նաև պետք է ընտրվի տվյալների փոխանցման պրոտոկոլը՝ Art Net-ը և SACN-ը հաճախ օգտագործվող տարբերակներ են: Դա օգնում է ամեն ինչ հարմարավետ կերպով փոխգործակցել առանց խնդիրների: Ըստ 2023 թվականին Display Lab-ի տվյալների՝ մարդիկ առաջին փուլում սխալ ֆիզիկական չափումներ կատարելու պատճառով առաջացած խնդիրների հետ են հանդիպում այդ համակարգերը տեղադրելիս:
Ընտրել ծրագրային ապահովում Լուսադիոդային Էկրանների Կառավարման և Ծրագրավորման Համար. NovaLCT և Ընտրանքներ
Չնայած NovaLCT-ն զբաղեցնում է ինքնուրույն LED կառավարման շուկայի 58%-ը (AVTech 2023), այլընտրանքային ծրագրեր, ինչպիսին են Linsn LEDStudio-ն և Colorlight iSet-ը, ապահովում են համեմատելի հնարավորություններ: Նախապահովեք ծրագրային ապահովման համատեղելիությունը ձեր վերահսկիչ քարտի (Novastar, Huidu և այլն) և օպերացիոն համակարգի հետ: Հիմնարար չափանիշներն են՝
| Հատկություն | NovaLCT | Ընտրանքներ |
|---|---|---|
| Իրաժամանակ նախադիտումներ | « Ներդրված | « Երրորդ կողմի հավելումներ |
| Բազմաէկրան աջակցություն | Մինչև 4 էկրան | Մինչև 8 էկրան |
| Ուսումնառության կտրվածք | Միջավոր | Ավելի կտրտական |
Ինչպես համակարգչի միջոցով NovaLCT ծրագրակազմի միջոցով կարգավորել LED էկրան
- Միացրեք ձեր PC-ն LED վերահսկիչին USB/Ethernet-ի միջոցով և գործարկեք NovaLCT-ն
- Ընտրել Էկրանի կարգավորում Ինտելեկտուալ կարգավորումներ
- Մուտքագրեք ձեր էկրանի ֆիզիկական դասավորությունը և թույլատրելի նկարը (օրինակ՝ 2x2 վահանական ցանց՝ 3840x2160)
- Կարգավորեք գունային կալիբրացիան 6500K-ի տնային միջավայրերի համար՝ օգտագործելով գամմա կորեկցիայի գործիքը
Փորձարկեք կարգավորումները փորձնական նյութերով ամփոփելուց առաջ: Սխալ պարամետրերի համապատասխանեցումը հաճախ պատճառ է դառնում հոգիների կամ գունային շերտավորման համար՝ խնդիրներ, որոնք լուծվում են դեպքերի 78%-ում՝ ֆիրմային ծրագրերի թարմացումների միջոցով
Կապի ստուգում սարքավորումների հետ՝ համակարգչային ծրագրակազմի և ֆիրմային ծրագրերի թարմացումների միջոցով
Կարգավորումից հետո ստուգեք միացումները՝ օգտագործելով ծրագրակազմի Սարքավորումների կառավարիչ վահանակին: Հաջող ճանաչման դեպքում վառ կանաչ ցուցիչներ են ցուցադրվում հսկիչի և մոդուլների համար: Ծրագրային ապահովումը թարմացրեք ներքո նշված նիշքի միջոցով՝ ավելի նոր տարբերակները բարելավում են HDMI 2.1 համատեղելիությունը և վերացնում են ուշացման խնդիրները: Ամեն անգամ վերագործարկեք համակարգը թարմացումից հետո՝ փոփոխություններն ակտիվացնելու համար Պահպանություն նիշք–ավելի նոր տարբերակները բարելավում են HDMI 2.1 համատեղելիությունը և վերացնում են ուշացման խնդիրները: Ամեն անգամ վերագործարկեք համակարգը թարմացումից հետո՝ փոփոխություններն ակտիվացնելու համար
Ծրագրավորում և Ձեր LED ցուցադրման վահանակի բովանդակության ձևավորում
Տեքստով, նկարներով և տեսանյութերով LED ցուցադրման վահանակի ծրագրավորում
Ներկայումս ամենօրյա ծրագրային ապահովումը թույլ է տալիս մարդկանց տեքստերը, նկարները կամ տեսանյութերը տեղադրել համակարգի մեջ՝ տանելով դրանք մկնիկով: Անիմացիայի հետ աշխատելիս շատ կարևոր է պահպանել հաճախականությունը համաժամանակեցված: Լավ ցուցադրման համար սովորաբար հարմար է լինում 30-ից մինչև 60 կադր վայրկյանում, որպեսզի տեսանյութը չթրթռա: Մի մոռանա ստուգել, թե ինչպես է ամեն ինչ արտահայտվում տարբեր լուսավորության պայմաններում: Որոշ տեսանյութեր վատ են արտացոլվում, երբ դրանք դիտվում են անսովոր անկյուններից: Եվ նույնպես հսկիր միջին չափի էկրանների վրա առկա լուծարկման խնդիրները: Եթե էկրանի պիքսելային քայլը մոտ 2,5-ից 5 մմ է, ապա ցանկացած բան, որը ցածր է 1600x1200 պիքսելից, կարող է աղավաղվել և տարօրինակ տեսք ունենալ:
Ծրագրային ապահովման միջոցով LED էկրանների հեռակառավարում և ծրագրավորում
Ժամանակակից համակարգերը թույլատրում են ամպային հսկում կայանքների կամ բջջային հավելվածների միջոցով, որտեղ 87% հսկիչները աջակցում են իրաժամանակ նյութերի թարմացմանը: Ստեղծեք ժամանակային հնարավորություններ նյութերի փոփոխման համար՝ օրինակ, աշխատանքային օրերի և շաբաթականի դեպքում, ինչպես նաև ապահովեք հեռակա հսկումը կարևոր սխալերի համար, ինչպես օրինակ լարման ընկնումը կամ մոդուլների անջատումը:
Լուսավորության նյութերի ծրագրավորում և ճշգրտում ըստ միջավայրի
Լույսի զգայուն սենսորների ավելացումը կօգնի ավտոմատ կերպով կարգավորել էկրանի լուսավորությունը՝ մոտ 800-ից մինչև 6,000 նիտ, ինչը մութ պայմաններում էլեկտրականության օգտագործումը կրճատում է մոտ 40%-ով: Այդ սարքերը արտաքին տարածքներում տեղադրելիս խելամի է ընտրել IP65 վարդանի ամբիենտ լույսի դետեկտորներ, քանի որ դրանք բավականին լավ են դիմանում ուղղակի արևի ճառագայթներին, սակայն կանխում են անհարմար գլարեցնող լույսերը գիշերը: Հիմնական գաղտնիքը լուսավորության կորը համապատասխանեցնել ցուցադրվող նյութի տիպին: Տեսահոլովուրդների համար իսկապես անհրաժեշտ է հզոր լույս, 5,000 նիտից ավելին աշխատում է հիանքով: Սակայն սովորական տեղեկատվական ցուցադրումների համար ոչ ոք չի ցանկանա թումբ լինել 5,000 նիտի վրա, այդ դեպքում 1,200-ից մինչև 2,000 նիտ պահելը ավելի հարմար է կարդացման համար՝ առանց աչքերի լարումից:
Հաճախ տրամադրվող հարցեր
Ի՞նչ են անհրաժեշտ բաղադրիչները LED էկրանային տախտակի համար:
LED էկրանային տախտակի հիմնական բաղադրիչների մեջ են մտնում LED մոդուլները, էլեկտրամատակարարման աղբյուրը, վերահսկիչ տախտակը, շրջանակը և միացնող լարերը:
Ինչպե՞ս ընտրել ճիշտ LED մոդուլը:
Ճիշտ LED մոդուլը ընտրելը կախված է պիքսելների քայլից և պայծառությունից: Տնային օգտագործման համար պիքսելների քայլի համար 2 մմ-ից մինչև 5 մմ պարզության համար իդեալական է, իսկ 800-ից մինչև 1,500 նիտ պայծառությունը հարմար է ներքին տեսանելիության համար:
Ինչ է կառավարիչ քարտի դերը LED էկրանում:
Կառավարիչ քարտը համակարգչի սիգնալները թարգմանում է այնպիսի ձևաչափի, որը կարող է ըմբռնվել LED էկրանի կողմից: Այն աջակցում է բարձր թարմացման հաճախականություններին՝ հարթ տեսանյութերի վերարտադրման համար և կարող է ներառել անջատման համակարգեր, որպեսզի կառավարվի սիգնալների ընդհատումները:
Ինչպե՞ս կարող եմ իմ LED էկրանը միացնել համակարգչին կառավարման համար:
Միացումը կարող է իրականացվել USB-ի, HDMI-ի կամ Ethernet-ի միջոցով՝ իրական ժամանակում կառավարման համար, կախված նրանից, թե ի՞նչ է անհրաժեշտ՝ բարձր թույլատվության, մասնագիտական ներկայացման կամ հեռակա կառավարման համար:
Ի՞նչ պետք է հաշվի առնել LED էկրանի համար ծրագրային ապահովումը սեղմադրելիս:
Հաշվի առնվում է համատեղելի կառավարման ծրագրային ապահովման տեղադրումը, էկրանի դասավորության և թույլատվության կարգավորումը, ցանցային կարգավորումների ճիշտ նշումը և համոզվել, որ ծրագրային ապահովումը համատեղելի է օգտագործվող սարքային միջոցների հետ: